FobesFamily.com2020-04-02T13:11:03+00:00http://fobesfamily.comOliviaRice Cooker Cilantro Lime Rice2016-03-04T00:00:00+00:00http://fobesfamily.com/2016/03/04/rice-cooker-cilantro-lime-rice<p><img src="https://fobesfamily.com/assets/images/2016/03/20160303-DSC_5358.jpg" alt="" /></p>
<p align=center style='text-align:center'><span>(Servings 4)</span></p>
<p style='text-indent:.5in'><span>I hope everyone had a wonderful Lenten Season and a Happy Easter! I know I’ve been MIA for quite a while now but I just came back from a long vacation home to visit family. You know how that goes; lots of activities, fun and of course food!
<p style='text-indent:.5in'><span>For
those of you who know me, you know I am a rice lover! I just need my carbs.
This recipe is a fast and easy way to give rice a new twist without having to
do much work. Just throw everything into the rice cooker and press start! As
I’ve probably already mentioned before, I enjoy lime and lemon flavors a tad bit
more intense than most so I’ve decreased the amount used in this recipe.
However, feel free to give your rice an extra dose of lime juice if you’re like
me. This Cilantro-Lime Rice was a perfect side to my <u>Honey-Lime-Mustard Slow
Cooker Pork</u>, another fast an easy recipe for a busy day.</span></p>
<p><img src="https://fobesfamily.com/assets/images/2016/03/20160303-DSC_5352.jpg" alt="" /></p>
<table class=MsoTableGrid border=1 cellspacing=0 cellpadding=0 width=534
style='width:533.5pt;border-collapse:collapse;border:none'>
<tr style='height:25.6pt'>
<td width=213 style='width:212.5pt;border:solid windowtext 1.0pt;padding:
0in 5.4pt 0in 5.4pt;height:25.6pt'>
<p><span>2/3 cup Basmati Rice</span></p>
</td>
<td width=321 style='width:321.0pt;border:solid windowtext 1.0pt;border-left:
none;padding:0in 5.4pt 0in 5.4pt;height:25.6pt'>
<p><span>1. Rinse until the water
runs clear.</span></p>
</td>
</tr>
<tr style='height:25.35pt'>
<td width=213 style='width:212.5pt;border:solid windowtext 1.0pt;border-top:
none;padding:0in 5.4pt 0in 5.4pt;height:25.35pt'>
<p><span>1 cup chicken stock</span></p>
</td>
<td width=321 rowspan=4 style='width:321.0pt;border-top:none;border-left:
none;border-bottom:solid windowtext 1.0pt;border-right:solid windowtext 1.0pt;
padding:0in 5.4pt 0in 5.4pt;height:25.35pt'>
<p><span>2. Add the rice to the
cooker along with all the seasoning and start the cooker.</span></p>
<p><span>3. Once the rice is
cooked, fluff with a rice paddle.</span></p>
</td>
</tr>
<tr style='height:25.35pt'>
<td width=213 style='width:212.5pt;border:solid windowtext 1.0pt;border-top:
none;padding:0in 5.4pt 0in 5.4pt;height:25.35pt'>
<p><span>1 tbsp lime juice</span></p>
</td>
</tr>
<tr style='height:25.35pt'>
<td width=213 style='width:212.5pt;border:solid windowtext 1.0pt;border-top:
none;padding:0in 5.4pt 0in 5.4pt;height:25.35pt'>
<p><span>1 tbsp butter</span></p>
</td>
</tr>
<tr style='height:25.35pt'>
<td width=213 style='width:212.5pt;border:solid windowtext 1.0pt;border-top:
none;padding:0in 5.4pt 0in 5.4pt;height:25.35pt'>
<p><span>1/2 tsp salt</span></p>
</td>
</tr>
<tr style='height:25.35pt'>
<td width=213 style='width:212.5pt;border:solid windowtext 1.0pt;border-top:
none;padding:0in 5.4pt 0in 5.4pt;height:25.35pt'>
<p><span>2 tbsps cilantro, chopped</span></p>
</td>
<td width=321 style='width:321.0pt;border-top:none;border-left:none;
border-bottom:solid windowtext 1.0pt;border-right:solid windowtext 1.0pt;
padding:0in 5.4pt 0in 5.4pt;height:25.35pt'>
<p><span>4. Mix the cilantro into
the rice and serve hot. </span></p>
</td>
</tr>
</table>
Honey Lime Mustard Slow Cooker Pork2016-03-04T00:00:00+00:00http://fobesfamily.com/2016/03/04/honey-lime-mustard-slow-cooker-pork<p><img src="https://fobesfamily.com/assets/images/2016/03/20160303-DSC_5367.jpg" alt="" /></p>
<p align=center style='text-align:center'><span>(Servings 8)
</span></p>
<p style='text-indent:.5in'><span>Do
you have one of those days where you just don’t want to fire up the stove? I
sure do, and on those days the slow cooker is my best friend. A simple way to
get a hot dinner on the table with minimal clean up. Throw everything into the
pot, turn on the cooker and let it work its magic while you tend to your busy
life. Sometimes, that’s the only way to get through the day when you have a
sick child in tow, running on no sleep and there are still a million chores to
do. </span></p>
<p><img src="https://fobesfamily.com/assets/images/2016/03/20160303-DSC_5326.jpg" alt="" /></p>
<p style='text-indent:.5in'><span>This
honey, lime and mustard combination lends to a great flavor profile. The long
hours spent in the slow cooker allowed the flavors to blend and infuse the pork
leaving it tender, juicy and savory. The best part is there will be plenty of leftovers
for lunch the next day! I like to serve this pork with another quick side dish
of <u>Rice Cooker Cilantro-Lime Rice.</u> Yet another simple recipe that lets a
machine work its magic to give you time to do what you have to do.</span></p>
<p><img src="https://fobesfamily.com/assets/images/2016/03/20160303-DSC_5330.jpg" alt="" />
<img src="https://fobesfamily.com/assets/images/2016/03/20160303-DSC_5341.jpg" alt="" /></p>
<p style='text-indent:.5in'><span>I
enjoy using this recipe when I know I will be out of the house for a long time
for an event or just a long excursion to the Asian grocery store. I don’t have
to worry about coming home and making dinner since it will already be done and
waiting to be eaten. The aroma engulfs you right when you walk through the door
to let you know dinner is ready! </span></p>
<p><img src="https://fobesfamily.com/assets/images/2016/03/20160303-DSC_5349.jpg" alt="" /></p>
<table class=MsoTableGrid border=1 cellspacing=0 cellpadding=0 width=542
style='width:542.0pt;border-collapse:collapse;border:none'>
<tr style='height:21.8pt'>
<td width=238 style='width:3.3in;border:solid windowtext 1.0pt;padding:0in 5.4pt 0in 5.4pt;
height:21.8pt'>
<p><span>2 large onions, sliced
thickly</span></p>
</td>
<td width=304 rowspan=2 style='width:304.4pt;border:solid windowtext 1.0pt;
border-left:none;padding:0in 5.4pt 0in 5.4pt;height:21.8pt'>
<p><span>1. Layer the bottom of the
slower cooker with the garlic and half of the onions.</span></p>
</td>
</tr>
<tr style='height:21.4pt'>
<td width=238 style='width:3.3in;border:solid windowtext 1.0pt;border-top:
none;padding:0in 5.4pt 0in 5.4pt;height:21.4pt'>
<p><span>3 garlic cloves, smashed</span></p>
</td>
</tr>
<tr style='height:21.4pt'>
<td width=238 style='width:3.3in;border:solid windowtext 1.0pt;border-top:
none;padding:0in 5.4pt 0in 5.4pt;height:21.4pt'>
<p><span>1/2 cup honey</span></p>
</td>
<td width=304 rowspan=3 style='width:304.4pt;border-top:none;border-left:
none;border-bottom:solid windowtext 1.0pt;border-right:solid windowtext 1.0pt;
padding:0in 5.4pt 0in 5.4pt;height:21.4pt'>
<p><span>2. Whisk the sauce
ingredients together and set aside.</span></p>
</td>
</tr>
<tr style='height:21.4pt'>
<td width=238 style='width:3.3in;border:solid windowtext 1.0pt;border-top:
none;padding:0in 5.4pt 0in 5.4pt;height:21.4pt'>
<p><span>1/2 cup Dijon mustard</span></p>
</td>
</tr>
<tr style='height:21.4pt'>
<td width=238 style='width:3.3in;border:solid windowtext 1.0pt;border-top:
none;padding:0in 5.4pt 0in 5.4pt;height:21.4pt'>
<p><span>3/4 tsp garlic powder</span></p>
</td>
</tr>
<tr style='height:21.4pt'>
<td width=238 style='width:3.3in;border:solid windowtext 1.0pt;border-top:
none;padding:0in 5.4pt 0in 5.4pt;height:21.4pt'>
<p><span>2 1/2 tsp salt</span></p>
</td>
<td width=304 rowspan=3 style='width:304.4pt;border-top:none;border-left:
none;border-bottom:solid windowtext 1.0pt;border-right:solid windowtext 1.0pt;
padding:0in 5.4pt 0in 5.4pt;height:21.4pt'>
<p><span>3. Evenly rub the salt and
black pepper on the pork butt.</span></p>
<p><span>4. Place the pork in the
middle of the slow cooker on top of the onion.</span></p>
<p><span>5. Spread the sauce mix
evenly on the pork.</span></p>
</td>
</tr>
<tr style='height:21.4pt'>
<td width=238 style='width:3.3in;border:solid windowtext 1.0pt;border-top:
none;padding:0in 5.4pt 0in 5.4pt;height:21.4pt'>
<p><span>1 1/2 tsp black pepper</span></p>
</td>
</tr>
<tr style='height:21.4pt'>
<td width=238 style='width:3.3in;border:solid windowtext 1.0pt;border-top:
none;padding:0in 5.4pt 0in 5.4pt;height:21.4pt'>
<p><span>4 lbs pork butt roast</span></p>
</td>
</tr>
<tr style='height:21.4pt'>
<td width=238 style='width:3.3in;border:solid windowtext 1.0pt;border-top:
none;padding:0in 5.4pt 0in 5.4pt;height:21.4pt'>
<p><span>2 cups bell peppers
assorted, chopped</span></p>
</td>
<td width=304 rowspan=2 style='width:304.4pt;border-top:none;border-left:
none;border-bottom:solid windowtext 1.0pt;border-right:solid windowtext 1.0pt;
padding:0in 5.4pt 0in 5.4pt;height:21.4pt'>
<p><span>6. Sprinkle the bell
peppers, zest and remaining onions on top of the pork.</span></p>
</td>
</tr>
<tr style='height:21.4pt'>
<td width=238 style='width:3.3in;border:solid windowtext 1.0pt;border-top:
none;padding:0in 5.4pt 0in 5.4pt;height:21.4pt'>
<p><span>1 tbsp lime zest</span></p>
</td>
</tr>
<tr style='height:21.4pt'>
<td width=238 style='width:3.3in;border:solid windowtext 1.0pt;border-top:
none;padding:0in 5.4pt 0in 5.4pt;height:21.4pt'>
<p><span>1/2 cup chicken stock</span></p>
</td>
<td width=304 rowspan=2 style='width:304.4pt;border-top:none;border-left:
none;border-bottom:solid windowtext 1.0pt;border-right:solid windowtext 1.0pt;
padding:0in 5.4pt 0in 5.4pt;height:21.4pt'>
<p><span>7. Pour in the chicken
stock and lime juice.</span></p>
<p><span>8. Cover and cook on low
for 8-9 hours until the pork is tender and is easily shredded.</span></p>
</td>
</tr>
<tr style='height:21.4pt'>
<td width=238 style='width:3.3in;border:solid windowtext 1.0pt;border-top:
none;padding:0in 5.4pt 0in 5.4pt;height:21.4pt'>
<p><span>2 tbsps lime juice</span></p>
</td>
</tr>
</table>
Char Siu (xá Xíu)2016-03-04T00:00:00+00:00http://fobesfamily.com/2016/03/04/char-siu-(xá-xíu)<p><img src="https://fobesfamily.com/assets/images/2016/03/20151214-DSC_5058.jpg" alt="" /></p>
<p align=center style='text-align:center'><span>(Servings 8)</span></p>
<p style='text-indent:.5in'><span>Growing
up in Southern California, char siu is not exactly hard to come by. Go down the
block and a handful of places have their own version to sell. However, that is
no longer a luxury I can enjoy. I suppose it’s a blessing in disguise since it
forces me to learn how to make my own version and have another post for my
blog! </span></p>
<p style='text-indent:.5in'><span>Char
Siu is highly popular in Asian Cuisine, served in so many different ways. Each
country seems to have their own take on how to make it. A succulent roast, the
pork can be steamed in buns, served over noodles, accompanied with rice or
stuffed in sandwiches; the presentations are endless but one thing holds true,
it is delicious! </span></p>
<p style='text-indent:.5in'><span>The
recipe version that I have here is rather straight-forward. Make the marinade,
marinate, and then roast. I admit, I did cheat a little in this recipe and used
a prepackaged marinade mix that I slightly enhanced. What can I say, there’s
just some of those lazy days I just want to go the easy route in the kitchen.
Surely I’m not the only one. Don’t worry, the end result is still wonderfully delightful.
</span></p>
<p style='text-indent:.5in'><span>Your
house will smell heavenly while the pork fat renders in the oven and the meat
takes on the beautiful reddish-pink color with splashes of black charring on
the meat. Have some pickled veggies ready or just a plate of sliced cucumbers
on hand with rice and your meal is complete. The leftovers make a great hot
lunch for the next day too! </span></p>
<p><img src="https://fobesfamily.com/assets/images/2016/03/20151214-DSC_5055.jpg" alt="" /></p>
<p><span> </span></p>
<table class=MsoTableGrid border=1 cellspacing=0 cellpadding=0 width=525
style='width:525.1pt;border-collapse:collapse;border:none'>
<tr style='height:33.75pt'>
<td width=217 style='width:216.9pt;border:solid windowtext 1.0pt;padding:
0in 5.4pt 0in 5.4pt;height:33.75pt'>
<p><span>1 packet of Noh Brand
Chinese Char Siu Marinade</span></p>
</td>
<td width=308 rowspan=7 style='width:308.2pt;border:solid windowtext 1.0pt;
border-left:none;padding:0in 5.4pt 0in 5.4pt;height:33.75pt'>
<p><span>1. Mix ingredients well.</span></p>
</td>
</tr>
<tr style='height:33.75pt'>
<td width=217 style='width:216.9pt;border:solid windowtext 1.0pt;border-top:
none;padding:0in 5.4pt 0in 5.4pt;height:33.75pt'>
<p><span>1/2 cup water</span></p>
</td>
</tr>
<tr style='height:33.75pt'>
<td width=217 style='width:216.9pt;border:solid windowtext 1.0pt;border-top:
none;padding:0in 5.4pt 0in 5.4pt;height:33.75pt'>
<p><span>2 tbsps sugar</span></p>
</td>
</tr>
<tr style='height:33.75pt'>
<td width=217 style='width:216.9pt;border:solid windowtext 1.0pt;border-top:
none;padding:0in 5.4pt 0in 5.4pt;height:33.75pt'>
<p><span>1 tsp msg</span></p>
</td>
</tr>
<tr style='height:33.75pt'>
<td width=217 style='width:216.9pt;border:solid windowtext 1.0pt;border-top:
none;padding:0in 5.4pt 0in 5.4pt;height:33.75pt'>
<p><span>1/2 cup soy sauce, low
sodium</span></p>
</td>
</tr>
<tr style='height:33.75pt'>
<td width=217 style='width:216.9pt;border:solid windowtext 1.0pt;border-top:
none;padding:0in 5.4pt 0in 5.4pt;height:33.75pt'>
<p><span>1/4 cup honey</span></p>
</td>
</tr>
<tr style='height:33.75pt'>
<td width=217 style='width:216.9pt;border:solid windowtext 1.0pt;border-top:
none;padding:0in 5.4pt 0in 5.4pt;height:33.75pt'>
<p><span>4 drops red food coloring</span></p>
</td>
</tr>
<tr style='height:33.75pt'>
<td width=217 style='width:216.9pt;border:solid windowtext 1.0pt;border-top:
none;padding:0in 5.4pt 0in 5.4pt;height:33.75pt'>
<p><span>1 1/2 – 2 lbs pork belly
or pork butt</span></p>
</td>
<td width=308 style='width:308.2pt;border-top:none;border-left:none;
border-bottom:solid windowtext 1.0pt;border-right:solid windowtext 1.0pt;
padding:0in 5.4pt 0in 5.4pt;height:33.75pt'>
<p><span>2. In a Ziploc bag,
marinade the meat overnight or up to three days.</span></p>
<p><span>3. Place the meat and
marinade in a roasting pan and bake at 350F for about 80 minutes until done.</span></p>
<p><span>4. Flip the meat every 20
minutes to create an even coating.</span></p>
<p><span>5. Let the meat rest for
about 15 minutes prior to cutting the pork.</span></p>
</td>
</tr>
</table>
Vietnamese Stuffed Squid2016-02-19T00:00:00+00:00http://fobesfamily.com/2016/02/19/vietnamese-stuffed-squid<p><img src="https://fobesfamily.com/assets/images/2016/02/20150927-IMG_5962.jpg" alt="" /></p>
<p align=center style='text-align:center'><span>(Servings 4)</span></p>
<p style='text-indent:.5in'><span>I wish everyone a Happy Mother's Day Weekend! For
years I’ve been telling my husband about this stuffed squid my mom used to make
on special occasions when I was younger, promising to recreate it so he can
have a taste. And I have finally broken down and made this for him. I honestly
don’t know why it took me so long but I think this dish did not fail to
impress.</span></p>
<p><img src="https://fobesfamily.com/assets/images/2016/02/20150927-DSC_4356.jpg" alt="" /></p>
<p style='text-indent:.5in'><span>The
white squid was a great canvas for the sauce that turned it into a beautiful
golden brown. Steaming the stuffed squid allowed for it to cook while keeping
everything nice and moist. Giving the tentacles the last minute cook in the
sauce made it wonderful and crunchy without a rubbery texture from over
cooking. </span></p>
<p><img src="https://fobesfamily.com/assets/images/2016/02/20150927-DSC_4374.jpg" alt="" /></p>
<p style='text-indent:.5in'><span>This
is probably one of the healthier ways to enjoy squid, not to say that I’d say
no to a dish of crispy calamari. If you’re ever in the mood to try something
different, try out this recipe and let me know what you think.</span></p>
<table class=MsoTableGrid border=1 cellspacing=0 cellpadding=0 width=533
style='width:533.15pt;border-collapse:collapse;border:none'>
<tr style='height:25.5pt'>
<td width=239 style='width:239.4pt;border:solid windowtext 1.0pt;padding:
0in 5.4pt 0in 5.4pt;height:25.5pt'>
<p><span>1/4 oz dried wood ear
mushroom, soaked, drained and minced</span></p>
</td>
<td width=294 rowspan=11 style='width:293.75pt;border:solid windowtext 1.0pt;
border-left:none;padding:0in 5.4pt 0in 5.4pt;height:25.5pt'>
<p><span>1. Mix all ingredients
together until well combined.</span></p>
</td>
</tr>
<tr style='height:22.9pt'>
<td width=239 style='width:239.4pt;border:solid windowtext 1.0pt;border-top:
none;padding:0in 5.4pt 0in 5.4pt;height:22.9pt'>
<p><span>1/2 oz dry bean thread
noodle, soaked, drained and minced</span></p>
</td>
</tr>
<tr style='height:22.9pt'>
<td width=239 style='width:239.4pt;border:solid windowtext 1.0pt;border-top:
none;padding:0in 5.4pt 0in 5.4pt;height:22.9pt'>
<p><span>1/4 cup shallots, minced</span></p>
</td>
</tr>
<tr style='height:22.9pt'>
<td width=239 style='width:239.4pt;border:solid windowtext 1.0pt;border-top:
none;padding:0in 5.4pt 0in 5.4pt;height:22.9pt'>
<p><span>6 oz ground pork</span></p>
</td>
</tr>
<tr style='height:22.9pt'>
<td width=239 style='width:239.4pt;border:solid windowtext 1.0pt;border-top:
none;padding:0in 5.4pt 0in 5.4pt;height:22.9pt'>
<p><span>1/4 cup scallion, minced</span></p>
</td>
</tr>
<tr style='height:22.9pt'>
<td width=239 style='width:239.4pt;border:solid windowtext 1.0pt;border-top:
none;padding:0in 5.4pt 0in 5.4pt;height:22.9pt'>
<p><span>1/2 tsp black pepper,
ground</span></p>
</td>
</tr>
<tr style='height:22.9pt'>
<td width=239 style='width:239.4pt;border:solid windowtext 1.0pt;border-top:
none;padding:0in 5.4pt 0in 5.4pt;height:22.9pt'>
<p><span>1/4 tsp salt</span></p>
</td>
</tr>
<tr style='height:22.9pt'>
<td width=239 style='width:239.4pt;border:solid windowtext 1.0pt;border-top:
none;padding:0in 5.4pt 0in 5.4pt;height:22.9pt'>
<p><span>1 tsp sugar</span></p>
</td>
</tr>
<tr style='height:22.9pt'>
<td width=239 style='width:239.4pt;border:solid windowtext 1.0pt;border-top:
none;padding:0in 5.4pt 0in 5.4pt;height:22.9pt'>
<p><span>1/2 tsp five spice blend</span></p>
</td>
</tr>
<tr style='height:22.9pt'>
<td width=239 style='width:239.4pt;border:solid windowtext 1.0pt;border-top:
none;padding:0in 5.4pt 0in 5.4pt;height:22.9pt'>
<p><span>2 tsp fish sauce</span></p>
</td>
</tr>
<tr style='height:22.9pt'>
<td width=239 style='width:239.4pt;border:solid windowtext 1.0pt;border-top:
none;padding:0in 5.4pt 0in 5.4pt;height:22.9pt'>
<p><span>1/4 tsp msg (optional)</span></p>
</td>
</tr>
<tr style='height:22.9pt'>
<td width=239 style='width:239.4pt;border:solid windowtext 1.0pt;border-top:
none;padding:0in 5.4pt 0in 5.4pt;height:22.9pt'>
<p><span>12 oz whole squid, cleaned
and pat dry</span></p>
</td>
<td width=294 style='width:293.75pt;border-top:none;border-left:none;
border-bottom:solid windowtext 1.0pt;border-right:solid windowtext 1.0pt;
padding:0in 5.4pt 0in 5.4pt;height:22.9pt'>
<p><span>2. Separate the tubes and
tentacles.</span></p>
<p><span>3. Stuff the tubes with
the meat mixture.</span></p>
<p><span> </span></p>
<p><span>(NOTE: Careful not to
overstuff as the squid will shrink once cooked.)</span></p>
<p><span> </span></p>
<p><span>4. Place the stuffed squid
onto a plate and steam for about 20 minutes until it is cooked through.</span></p>
</td>
</tr>
<tr style='height:22.9pt'>
<td width=239 style='width:239.4pt;border:solid windowtext 1.0pt;border-top:
none;padding:0in 5.4pt 0in 5.4pt;height:22.9pt'>
<p><span>1 tbsp olive oil</span></p>
</td>
<td width=294 style='width:293.75pt;border-top:none;border-left:none;
border-bottom:solid windowtext 1.0pt;border-right:solid windowtext 1.0pt;
padding:0in 5.4pt 0in 5.4pt;height:22.9pt'>
<p><span>5. Heat oil in a pan on
medium heat.</span></p>
</td>
</tr>
<tr style='height:22.9pt'>
<td width=239 style='width:239.4pt;border:solid windowtext 1.0pt;border-top:
none;padding:0in 5.4pt 0in 5.4pt;height:22.9pt'>
<p><span>1 tbsp garlic, minced</span></p>
</td>
<td width=294 rowspan=3 style='width:293.75pt;border-top:none;border-left:
none;border-bottom:solid windowtext 1.0pt;border-right:solid windowtext 1.0pt;
padding:0in 5.4pt 0in 5.4pt;height:22.9pt'>
<p><span>6. Sautee for about 3
minutes until softened.</span></p>
</td>
</tr>
<tr style='height:22.9pt'>
<td width=239 style='width:239.4pt;border:solid windowtext 1.0pt;border-top:
none;padding:0in 5.4pt 0in 5.4pt;height:22.9pt'>
<p><span>1/4 cup shallots, minced</span></p>
</td>
</tr>
<tr style='height:22.9pt'>
<td width=239 style='width:239.4pt;border:solid windowtext 1.0pt;border-top:
none;padding:0in 5.4pt 0in 5.4pt;height:22.9pt'>
<p><span>1/4 cup yellow onion,
chopped</span></p>
</td>
</tr>
<tr style='height:22.9pt'>
<td width=239 style='width:239.4pt;border:solid windowtext 1.0pt;border-top:
none;padding:0in 5.4pt 0in 5.4pt;height:22.9pt'>
<p><span>4 tbsps water</span></p>
</td>
<td width=294 rowspan=6 style='width:293.75pt;border-top:none;border-left:
none;border-bottom:solid windowtext 1.0pt;border-right:solid windowtext 1.0pt;
padding:0in 5.4pt 0in 5.4pt;height:22.9pt'>
<p><span>7. Add the remaining
seasoning and cook until the sauce thickens, about 3-5 minutes.</span></p>
<p><span>8. Toss the reserved tentacles
into the sauce and cook through.</span></p>
<p><span>9. Then add the steamed
squid tubes, gently tossing to coat with sauce.</span></p>
<p><span>10. Plate and serve hot.</span></p>
</td>
</tr>
<tr style='height:22.9pt'>
<td width=239 style='width:239.4pt;border:solid windowtext 1.0pt;border-top:
none;padding:0in 5.4pt 0in 5.4pt;height:22.9pt'>
<p><span>1 tbsp garlic chili</span></p>
</td>
</tr>
<tr style='height:22.9pt'>
<td width=239 style='width:239.4pt;border:solid windowtext 1.0pt;border-top:
none;padding:0in 5.4pt 0in 5.4pt;height:22.9pt'>
<p><span>1 tbsp dark mushroom soy
sauce</span></p>
</td>
</tr>
<tr style='height:22.9pt'>
<td width=239 style='width:239.4pt;border:solid windowtext 1.0pt;border-top:
none;padding:0in 5.4pt 0in 5.4pt;height:22.9pt'>
<p><span>1/2 tsp five spice blend</span></p>
</td>
</tr>
<tr style='height:22.9pt'>
<td width=239 style='width:239.4pt;border:solid windowtext 1.0pt;border-top:
none;padding:0in 5.4pt 0in 5.4pt;height:22.9pt'>
<p><span>1/4 tsp salt</span></p>
</td>
</tr>
<tr style='height:22.9pt'>
<td width=239 style='width:239.4pt;border:solid windowtext 1.0pt;border-top:
none;padding:0in 5.4pt 0in 5.4pt;height:22.9pt'>
<p><span>1 1/2 tsp sugar</span></p>
</td>
</tr>
</table>
Tangy Honey Walnut Shrimp2016-02-19T00:00:00+00:00http://fobesfamily.com/2016/02/19/tangy-honey-walnut-shrimp<p><img src="https://fobesfamily.com/assets/images/2016/02/20151114-DSC_4826.jpg" alt="" /></p>
<p align=center style='text-align:center'><span>(Servings 4)</span></p>
<p style='text-indent:.5in'><span>I can’t believe I’ve had this food blog for over a year now. Thanks to everyone who have supported me in this endeavor! To celebrate, I have a very festive dish for this week’s post. Honey
Walnut Shrimp has always been a favorite for the men in my life. First my
brothers and now my husband. To be honest, I never really wanted to make this
dish at home since I figured it would be too time consuming. Now that I have
attempted this dish a few times, it was not as bad as I had original assumed. The
walnut, shrimp and sauce can be prepped ahead of time allowing the cooking
process to be much quicker for when you are ready to eat. </span></p>
<p><img src="https://fobesfamily.com/assets/images/2016/02/20151114-DSC_4793.jpg" alt="" /></p>
<p style='text-indent:.5in'><span>The
best part about making this dish at home for me is being able to control the
amount of sauce used and it’s flavoring. Sometimes when we eat out, the
restaurant is either way to liberal with the sauce or is skimpy with it. As a
personal preference, I enjoy the sauce a little more on the tangy end of the
spectrum but it tends to be served more sweet. All is well if I just make my
own right?</span></p>
<p><img src="https://fobesfamily.com/assets/images/2016/02/20151114-DSC_4800.jpg" alt="" />
<img src="https://fobesfamily.com/assets/images/2016/02/20151114-DSC_4808.jpg" alt="" /></p>
<p style='text-indent:.5in'><span>Some
disadvantages with making Tangy Honey Walnut Shrimp is that it needs to be
served piping hot and does not reheat well. To combat these issues, I usually
place the fried shrimp in a warmed oven when I make larger batched to retain
its crispy texture as well as keep it warm or scale down the recipe to make
just enough for one sitting. Also, prepping everything ahead of time is a great
way to get this dish to the table quickly so you and your loved ones can enjoy
a wonderful meal together!</span></p>
<p><img src="https://fobesfamily.com/assets/images/2016/02/20151114-DSC_4798.jpg" alt="" />
<img src="https://fobesfamily.com/assets/images/2016/02/20151114-DSC_4822.jpg" alt="" /></p>
<table class=MsoTableGrid border=1 cellspacing=0 cellpadding=0 width=534
style='width:533.5pt;border-collapse:collapse;border:none'>
<tr style='height:25.55pt'>
<td width=217 style='width:216.95pt;border:solid windowtext 1.0pt;padding:
0in 5.4pt 0in 5.4pt;height:25.55pt'>
<p><span>1/4 cup water</span></p>
</td>
<td width=317 rowspan=2 style='width:316.55pt;border:solid windowtext 1.0pt;
border-left:none;padding:0in 5.4pt 0in 5.4pt;height:25.55pt'>
<p><span>1. Bring water and sugar
to a boil.</span></p>
<p><span>2. On medium-high heat,
stir the glaze for about 5 minutes until slightly thickens. </span></p>
</td>
</tr>
<tr style='height:25.15pt'>
<td width=217 style='width:216.95pt;border:solid windowtext 1.0pt;border-top:
none;padding:0in 5.4pt 0in 5.4pt;height:25.15pt'>
<p><span>1/4 cup sugar</span></p>
</td>
</tr>
<tr style='height:25.15pt'>
<td width=217 style='width:216.95pt;border:solid windowtext 1.0pt;border-top:
none;padding:0in 5.4pt 0in 5.4pt;height:25.15pt'>
<p><span>1/2 cup walnut halves</span></p>
</td>
<td width=317 style='width:316.55pt;border-top:none;border-left:none;
border-bottom:solid windowtext 1.0pt;border-right:solid windowtext 1.0pt;
padding:0in 5.4pt 0in 5.4pt;height:25.15pt'>
<p><span>3. Rinse the walnut with
cold water and stir into the glaze.</span></p>
<p><span>4. Lower to medium-low
heat and stir until golden brown.</span></p>
<p><span>5. Spread the glazed
walnut onto wax paper ensuring none of the pieces or touching or sitting in a
pool of glaze.</span></p>
<p><span>6. Let cool completely.</span></p>
</td>
</tr>
<tr style='height:25.15pt'>
<td width=217 style='width:216.95pt;border:solid windowtext 1.0pt;border-top:
none;padding:0in 5.4pt 0in 5.4pt;height:25.15pt'>
<p><span>3 tbsps honey</span></p>
</td>
<td width=317 rowspan=4 style='width:316.55pt;border-top:none;border-left:
none;border-bottom:solid windowtext 1.0pt;border-right:solid windowtext 1.0pt;
padding:0in 5.4pt 0in 5.4pt;height:25.15pt'>
<p><span>7. Whisk all ingredients
together in a separate bowl.</span></p>
<p><span>8. Adjust to taste.</span></p>
</td>
</tr>
<tr style='height:25.15pt'>
<td width=217 style='width:216.95pt;border:solid windowtext 1.0pt;border-top:
none;padding:0in 5.4pt 0in 5.4pt;height:25.15pt'>
<p><span>1/3 cup mayo</span></p>
</td>
</tr>
<tr style='height:25.15pt'>
<td width=217 style='width:216.95pt;border:solid windowtext 1.0pt;border-top:
none;padding:0in 5.4pt 0in 5.4pt;height:25.15pt'>
<p><span>1/2 cup condensed milk</span></p>
</td>
</tr>
<tr style='height:25.15pt'>
<td width=217 style='width:216.95pt;border:solid windowtext 1.0pt;border-top:
none;padding:0in 5.4pt 0in 5.4pt;height:25.15pt'>
<p><span>2 tbsps lemon juice, fresh</span></p>
</td>
</tr>
<tr style='height:25.15pt'>
<td width=217 style='width:216.95pt;border:solid windowtext 1.0pt;border-top:
none;padding:0in 5.4pt 0in 5.4pt;height:25.15pt'>
<p><span>1/2 tsp salt</span></p>
</td>
<td width=317 rowspan=2 style='width:316.55pt;border-top:none;border-left:
none;border-bottom:solid windowtext 1.0pt;border-right:solid windowtext 1.0pt;
padding:0in 5.4pt 0in 5.4pt;height:25.15pt'>
<p><span>9. Beat together well.</span></p>
</td>
</tr>
<tr style='height:27.4pt'>
<td width=217 style='width:216.95pt;border:solid windowtext 1.0pt;border-top:
none;padding:0in 5.4pt 0in 5.4pt;height:27.4pt'>
<p><span>1 egg</span></p>
</td>
</tr>
<tr style='height:25.15pt'>
<td width=217 style='width:216.95pt;border:solid windowtext 1.0pt;border-top:
none;padding:0in 5.4pt 0in 5.4pt;height:25.15pt'>
<p><span>1 lb shrimp, peeled and
deveined</span></p>
</td>
<td width=317 style='width:316.55pt;border-top:none;border-left:none;
border-bottom:solid windowtext 1.0pt;border-right:solid windowtext 1.0pt;
padding:0in 5.4pt 0in 5.4pt;height:25.15pt'>
<p><span>10. Mix the shrimp into
the egg mix and let marinate for at least 20 minutes.</span></p>
<p><span>11. Strain the shrimp from
the remaining liquid.</span></p>
</td>
</tr>
<tr style='height:25.15pt'>
<td width=217 style='width:216.95pt;border:solid windowtext 1.0pt;border-top:
none;padding:0in 5.4pt 0in 5.4pt;height:25.15pt'>
<p><span>~1 cup cornstarch</span></p>
</td>
<td width=317 style='width:316.55pt;border-top:none;border-left:none;
border-bottom:solid windowtext 1.0pt;border-right:solid windowtext 1.0pt;
padding:0in 5.4pt 0in 5.4pt;height:25.15pt'>
<p><span>12. Evenly coat the shrimp
in cornstarch.</span></p>
<p><span> </span></p>
<p><span>(NOTE: Be sure to shake
off excess cornstarch.)</span></p>
</td>
</tr>
<tr style='height:25.15pt'>
<td width=217 style='width:216.95pt;border:solid windowtext 1.0pt;border-top:
none;padding:0in 5.4pt 0in 5.4pt;height:25.15pt'>
<p><span>Vegetable oil</span></p>
</td>
<td width=317 style='width:316.55pt;border-top:none;border-left:none;
border-bottom:solid windowtext 1.0pt;border-right:solid windowtext 1.0pt;
padding:0in 5.4pt 0in 5.4pt;height:25.15pt'>
<p><span>13. On medium-high heat,
deep-fry the shrimp in batches and drain on paper towels or cooling rack.</span></p>
<p><span> </span></p>
<p><span>(NOTE: I find the cooling
rack keeps the shrimp crisper.)</span></p>
<p><span> </span></p>
<p><span>14. Toss the cooked shrimp
in the mayo mix and plate.</span></p>
<p><span>15. Sprinkle with the
glazed walnuts and serve hot.</span></p>
</td>
</tr>
</table>
Steamed Shrimp Stuffed Eggplant2016-02-19T00:00:00+00:00http://fobesfamily.com/2016/02/19/steamed-shrimp-stuffed-eggplant<p><img src="https://fobesfamily.com/assets/images/2016/02/20150928-IMG_5982.jpg" alt="" /></p>
<p align=center style='text-align:center'><span>(Makes 4)</span></p>
<p><span> Japanese
eggplants are really hard to come by where I live. Well, to be exact, it’s hard
to find some that are fresh with vibrant skin. So on a recent trip to the Asian
store, I found an amazing batch of Japanese eggplants and could not refrain
from buying way too much. To be honest, I had no idea what I wanted to make
with them, but I figured inspiration will come to me once I got home. </span></p>
<p><img src="https://fobesfamily.com/assets/images/2016/02/20150928-IMG_5976.jpg" alt="" /></p>
<p><span> So
my husband has had a few my eggplant dishes; stew, deep-fried, stir-fried,
sautéed but never steamed. Since the loss of my bamboo steamer years ago that I
haven’t gotten around to replacing; steamed dishes never made the cut for the
dinner table. However, my mom had given me one of her smaller steamers on a
trip home over the summer that had ignited my need to for steamed dishes. So
heads up, there will probably be a few steamed dishes on my blog in the near
future.</span></p>
<p><img src="https://fobesfamily.com/assets/images/2016/02/20150928-IMG_5977.jpg" alt="" /></p>
<p><span> For
my husband’s first steamed eggplant dish, I decided to go with a simple shrimp
stuffing. This is actual a rendition of a popular dim sum plate. Truthfully,
the work that goes into this dish is a little tedious but the result is quite
delicious (and impressive when presented properly). The spongey eggplant makes
for a great carrier of the crunchy shrimp and absorption of the the sauce. I
love eggplant and I love sauce, so this is a great dish that highlights both! </span></p>
<p><img src="https://fobesfamily.com/assets/images/2016/02/20150928-IMG_5980.jpg" alt="" /></p>
<table class=MsoTableGrid border=1 cellspacing=0 cellpadding=0 width=551
style='width:550.9pt;border-collapse:collapse;border:none'>
<tr style='height:23.75pt'>
<td width=187 style='width:2.6in;border:solid windowtext 1.0pt;padding:0in 5.4pt 0in 5.4pt;
height:23.75pt'>
<p><span>14 oz shrimp, peeled,
deveined and minced</span></p>
</td>
<td width=364 rowspan=9 style='width:363.7pt;border:solid windowtext 1.0pt;
border-left:none;padding:0in 5.4pt 0in 5.4pt;height:23.75pt'>
<p><span>1. Mix the ingredients
until well incorporated.</span></p>
</td>
</tr>
<tr style='height:23.65pt'>
<td width=187 style='width:2.6in;border:solid windowtext 1.0pt;border-top:
none;padding:0in 5.4pt 0in 5.4pt;height:23.65pt'>
<p><span>1 egg, beaten</span></p>
</td>
</tr>
<tr style='height:23.65pt'>
<td width=187 style='width:2.6in;border:solid windowtext 1.0pt;border-top:
none;padding:0in 5.4pt 0in 5.4pt;height:23.65pt'>
<p><span>2 tbsps scallions, chopped</span></p>
</td>
</tr>
<tr style='height:23.65pt'>
<td width=187 style='width:2.6in;border:solid windowtext 1.0pt;border-top:
none;padding:0in 5.4pt 0in 5.4pt;height:23.65pt'>
<p><span>1 tsp rice wine</span></p>
</td>
</tr>
<tr style='height:23.65pt'>
<td width=187 style='width:2.6in;border:solid windowtext 1.0pt;border-top:
none;padding:0in 5.4pt 0in 5.4pt;height:23.65pt'>
<p><span>2 tsps sesame oil</span></p>
</td>
</tr>
<tr style='height:23.65pt'>
<td width=187 style='width:2.6in;border:solid windowtext 1.0pt;border-top:
none;padding:0in 5.4pt 0in 5.4pt;height:23.65pt'>
<p><span>1/4 tsp white pepper</span></p>
</td>
</tr>
<tr style='height:23.65pt'>
<td width=187 style='width:2.6in;border:solid windowtext 1.0pt;border-top:
none;padding:0in 5.4pt 0in 5.4pt;height:23.65pt'>
<p><span>1/2 tsp sugar</span></p>
</td>
</tr>
<tr style='height:23.65pt'>
<td width=187 style='width:2.6in;border:solid windowtext 1.0pt;border-top:
none;padding:0in 5.4pt 0in 5.4pt;height:23.65pt'>
<p><span>1/2 tsp salt</span></p>
</td>
</tr>
<tr style='height:23.65pt'>
<td width=187 style='width:2.6in;border:solid windowtext 1.0pt;border-top:
none;padding:0in 5.4pt 0in 5.4pt;height:23.65pt'>
<p><span>1/4 tsp msg (optional)</span></p>
</td>
</tr>
<tr style='height:23.65pt'>
<td width=187 style='width:2.6in;border:solid windowtext 1.0pt;border-top:
none;padding:0in 5.4pt 0in 5.4pt;height:23.65pt'>
<p><span>1 tbsp cornstarch</span></p>
</td>
<td width=364 style='width:363.7pt;border-top:none;border-left:none;
border-bottom:solid windowtext 1.0pt;border-right:solid windowtext 1.0pt;
padding:0in 5.4pt 0in 5.4pt;height:23.65pt'>
<p><span>2. Stir cornstarch in
until it dissolves and refrigerate for at least 30 minutes.</span></p>
</td>
</tr>
<tr style='height:23.65pt'>
<td width=187 style='width:2.6in;border:solid windowtext 1.0pt;border-top:
none;padding:0in 5.4pt 0in 5.4pt;height:23.65pt'>
<p><span>1.5 lbs Japanese eggplant</span></p>
</td>
<td width=364 style='width:363.7pt;border-top:none;border-left:none;
border-bottom:solid windowtext 1.0pt;border-right:solid windowtext 1.0pt;
padding:0in 5.4pt 0in 5.4pt;height:23.65pt'>
<p><span>3. Cut into 1.5” diagonal
slices.</span></p>
<p><span>4. Slice the pieces in the
middle but not all the way through to create space to stuff the shrimp
mix in the center.</span></p>
</td>
</tr>
<tr style='height:23.65pt'>
<td width=187 style='width:2.6in;border:solid windowtext 1.0pt;border-top:
none;padding:0in 5.4pt 0in 5.4pt;height:23.65pt'>
<p><span>Oil</span></p>
</td>
<td width=364 style='width:363.7pt;border-top:none;border-left:none;
border-bottom:solid windowtext 1.0pt;border-right:solid windowtext 1.0pt;
padding:0in 5.4pt 0in 5.4pt;height:23.65pt'>
<p><span>5.On medium heat add 1
tablespoon of oil in a pan and fry both sides of the stuffed eggplant until
golden brown. Add more oil as needed.</span></p>
<p><span>6. Transfer the fried
pieces to a heatproof plate and steam for about 10 minutes to cook the
stuffing through.</span></p>
<p><span> </span></p>
<p><span>(Note: Reserve the pool of
juices in the plate.)</span></p>
<p><span> </span></p>
<p><span>7. Make the sauce while
the eggplant finishes cooking.</span></p>
</td>
</tr>
<tr style='height:23.65pt'>
<td width=187 style='width:2.6in;border:solid windowtext 1.0pt;border-top:
none;padding:0in 5.4pt 0in 5.4pt;height:23.65pt'>
<p><span>1 tsp oil</span></p>
</td>
<td width=364 rowspan=3 style='width:363.7pt;border-top:none;border-left:
none;border-bottom:solid windowtext 1.0pt;border-right:solid windowtext 1.0pt;
padding:0in 5.4pt 0in 5.4pt;height:23.65pt'>
<p><span>8. On medium-high heat in
a saucepan, sauté for about 30 seconds.</span></p>
</td>
</tr>
<tr style='height:23.65pt'>
<td width=187 style='width:2.6in;border:solid windowtext 1.0pt;border-top:
none;padding:0in 5.4pt 0in 5.4pt;height:23.65pt'>
<p><span>1 tsp sesame oil</span></p>
</td>
</tr>
<tr style='height:23.65pt'>
<td width=187 style='width:2.6in;border:solid windowtext 1.0pt;border-top:
none;padding:0in 5.4pt 0in 5.4pt;height:23.65pt'>
<p><span>1 tsp garlic, minced</span></p>
</td>
</tr>
<tr style='height:23.65pt'>
<td width=187 style='width:2.6in;border:solid windowtext 1.0pt;border-top:
none;padding:0in 5.4pt 0in 5.4pt;height:23.65pt'>
<p><span>1 cup chicken stock</span></p>
</td>
<td width=364 rowspan=7 style='width:363.7pt;border-top:none;border-left:
none;border-bottom:solid windowtext 1.0pt;border-right:solid windowtext 1.0pt;
padding:0in 5.4pt 0in 5.4pt;height:23.65pt'>
<p><span>9. In a separate bowl, mix
the ingredient and reserved juices well and pour into the saucepan.</span></p>
<p><span>10. Adjust the sauce to
taste.</span></p>
</td>
</tr>
<tr style='height:23.65pt'>
<td width=187 style='width:2.6in;border:solid windowtext 1.0pt;border-top:
none;padding:0in 5.4pt 0in 5.4pt;height:23.65pt'>
<p><span>1 tbsp oyster sauce</span></p>
</td>
</tr>
<tr style='height:23.65pt'>
<td width=187 style='width:2.6in;border:solid windowtext 1.0pt;border-top:
none;padding:0in 5.4pt 0in 5.4pt;height:23.65pt'>
<p><span>2 tsps soy sauce</span></p>
</td>
</tr>
<tr style='height:23.65pt'>
<td width=187 style='width:2.6in;border:solid windowtext 1.0pt;border-top:
none;padding:0in 5.4pt 0in 5.4pt;height:23.65pt'>
<p><span>1 1/4 tsp sugar</span></p>
</td>
</tr>
<tr style='height:23.65pt'>
<td width=187 style='width:2.6in;border:solid windowtext 1.0pt;border-top:
none;padding:0in 5.4pt 0in 5.4pt;height:23.65pt'>
<p><span>1/4 tsp msg (optional)</span></p>
</td>
</tr>
<tr style='height:23.65pt'>
<td width=187 style='width:2.6in;border:solid windowtext 1.0pt;border-top:
none;padding:0in 5.4pt 0in 5.4pt;height:23.65pt'>
<p><span>1/4 tsp salt</span></p>
</td>
</tr>
<tr style='height:23.65pt'>
<td width=187 style='width:2.6in;border:solid windowtext 1.0pt;border-top:
none;padding:0in 5.4pt 0in 5.4pt;height:23.65pt'>
<p><span>1/4 tsp black pepper</span></p>
</td>
</tr>
<tr style='height:23.65pt'>
<td width=187 style='width:2.6in;border:solid windowtext 1.0pt;border-top:
none;padding:0in 5.4pt 0in 5.4pt;height:23.65pt'>
<p><span>2 tbsps cornstarch</span></p>
</td>
<td width=364 rowspan=2 style='width:363.7pt;border-top:none;border-left:
none;border-bottom:solid windowtext 1.0pt;border-right:solid windowtext 1.0pt;
padding:0in 5.4pt 0in 5.4pt;height:23.65pt'>
<p><span>11. Mix well and slowly
drizzle half of the cornstarch mix into the saucepan stirring the sauce
constantly. </span></p>
<p><span>12. Add more cornstarch
mix as needed to get your desired consistency.</span></p>
</td>
</tr>
<tr style='height:23.65pt'>
<td width=187 style='width:2.6in;border:solid windowtext 1.0pt;border-top:
none;padding:0in 5.4pt 0in 5.4pt;height:23.65pt'>
<p><span>2 tbsps water</span></p>
</td>
</tr>
<tr style='height:23.65pt'>
<td width=187 style='width:2.6in;border:solid windowtext 1.0pt;border-top:
none;padding:0in 5.4pt 0in 5.4pt;height:23.65pt'>
<p><span>Scallions, chopped</span></p>
</td>
<td width=364 style='width:363.7pt;border-top:none;border-left:none;
border-bottom:solid windowtext 1.0pt;border-right:solid windowtext 1.0pt;
padding:0in 5.4pt 0in 5.4pt;height:23.65pt'>
<p><span>13. Plate the eggplant,
top with sauce and sprinkle with scallions.</span></p>
<p><span>14. Serve hot.</span></p>
</td>
</tr>
</table>
Shrimp Opo Soup2016-02-19T00:00:00+00:00http://fobesfamily.com/2016/02/19/shrimp-opo-soup<p><img src="https://fobesfamily.com/assets/images/2016/02/20150927-DSC_4391.jpg" alt="" /></p>
<p align=center style='text-align:center'><span>(Servings 6)</span></p>
<p style='text-indent:.5in'><span>I
don’t know about you, but when the cold season starts to approach I
automatically go into a soup frenzy! All I can think about is making a hot pot
of brothy goodness. And why not right? The options are limitless. Plus, having
something simmering on the stove truly warms the house, and the aroma wafting
through the air is like a hug when you walk through the door after a long day.</span></p>
<p><img src="https://fobesfamily.com/assets/images/2016/02/20150927-DSC_4353.jpg" alt="" />
<img src="https://fobesfamily.com/assets/images/2016/02/20150927-DSC_4354.jpg" alt="" /></p>
<p style='text-indent:.5in'><span>Shrimp-based
soups are rather quick to make as the shrimp does not take long to cook, nor do
you want to overcook shrimp as it detracts from the texture. Vietnam, being a
coastal country, has a bounty of recipes for seafood soups and shrimps do star
in many. I can think of a handful of favorites I enjoyed as a child; Shrimp Opo
Soup being one of them. </span></p>
<p><img src="https://fobesfamily.com/assets/images/2016/02/20150927-DSC_4362-1.jpg" alt="" />
<img src="https://fobesfamily.com/assets/images/2016/02/20150927-DSC_4368.jpg" alt="" /></p>
<p style='text-indent:.5in'><span>Shrimp
Opo Soup is one of my preferred go to soup as it’s simple and doesn’t require
many ingredients. The clear broth allows the pink shrimp and light green opo to
pop. Combined with the minced cilantro and scallions, the broth becomes rather
aromatic. If you want, a couple shakes of black pepper will warm you with every
spoonful. For those who prefer a heartier jolt of spice, cut in some thai chili
and your nose can tell you what’s in-store before you even have a taste! You
can enjoy this on it’s own or with a side of jasmine rice. Some other dishes I
like to serve alongside this is Vietnamese Pickled Eggplant (Cà Phaó) and
Deep-Fried Tofu in a Scallion Fish Sauce. This is a perfect combination of
flavors and a great meal for those who celebrate Lenten Fridays when no meat is
allowed! </span></p>
<p><img src="https://fobesfamily.com/assets/images/2016/02/20150927-DSC_4370.jpg" alt="" /></p>
<table class=MsoTableGrid border=1 cellspacing=0 cellpadding=0 width=542
style='width:541.9pt;border-collapse:collapse;border:none'>
<tr style='height:24.25pt'>
<td width=194 style='width:2.7in;border:solid windowtext 1.0pt;padding:0in 5.4pt 0in 5.4pt;
height:24.25pt'>
<p><span>8 oz shrimp, peeled and
deviened</span></p>
</td>
<td width=348 style='width:347.5pt;border:solid windowtext 1.0pt;border-left:
none;padding:0in 5.4pt 0in 5.4pt;height:24.25pt'>
<p><span>1. Mince coarsely.</span></p>
</td>
</tr>
<tr style='height:22.75pt'>
<td width=194 style='width:2.7in;border:solid windowtext 1.0pt;border-top:
none;padding:0in 5.4pt 0in 5.4pt;height:22.75pt'>
<p><span>1/4 tsp salt</span></p>
</td>
<td width=348 rowspan=4 style='width:347.5pt;border-top:none;border-left:
none;border-bottom:solid windowtext 1.0pt;border-right:solid windowtext 1.0pt;
padding:0in 5.4pt 0in 5.4pt;height:22.75pt'>
<p><span>2. Sprinkle with seasoning
and proceed to mince the shrimp into almost a paste with a cleaver and set
aside.</span></p>
<p><span> </span></p>
<p><span>(NOTE: Do not use a food
processor for this step or the shrimp will come out rubbery.)</span></p>
</td>
</tr>
<tr style='height:22.75pt'>
<td width=194 style='width:2.7in;border:solid windowtext 1.0pt;border-top:
none;padding:0in 5.4pt 0in 5.4pt;height:22.75pt'>
<p><span>1/2 tsp sugar</span></p>
</td>
</tr>
<tr style='height:22.75pt'>
<td width=194 style='width:2.7in;border:solid windowtext 1.0pt;border-top:
none;padding:0in 5.4pt 0in 5.4pt;height:22.75pt'>
<p><span>1/4 tsp msg (optional)</span></p>
</td>
</tr>
<tr style='height:22.75pt'>
<td width=194 style='width:2.7in;border:solid windowtext 1.0pt;border-top:
none;padding:0in 5.4pt 0in 5.4pt;height:22.75pt'>
<p><span>1/2 tsp black pepper</span></p>
</td>
</tr>
<tr style='height:22.75pt'>
<td width=194 style='width:2.7in;border:solid windowtext 1.0pt;border-top:
none;padding:0in 5.4pt 0in 5.4pt;height:22.75pt'>
<p><span>6 cups water</span></p>
</td>
<td width=348 rowspan=5 style='width:347.5pt;border-top:none;border-left:
none;border-bottom:solid windowtext 1.0pt;border-right:solid windowtext 1.0pt;
padding:0in 5.4pt 0in 5.4pt;height:22.75pt'>
<p><span>3. Combine water and
seasoning in a large pot and bring to a boil.</span></p>
<p><span>4. While the water is
coming to a boil, drop about 2 teaspoons worth of the minced shrimp into the
pot at a time until done.</span></p>
<p><span>5. Skim the broth as
needed.</span></p>
<p><span>6. After the water comes
to a boil, continue cooking the shrimp until they float; about another 5
minutes.</span></p>
</td>
</tr>
<tr style='height:22.75pt'>
<td width=194 style='width:2.7in;border:solid windowtext 1.0pt;border-top:
none;padding:0in 5.4pt 0in 5.4pt;height:22.75pt'>
<p><span>2 tbsps fish sauce</span></p>
</td>
</tr>
<tr style='height:22.75pt'>
<td width=194 style='width:2.7in;border:solid windowtext 1.0pt;border-top:
none;padding:0in 5.4pt 0in 5.4pt;height:22.75pt'>
<p><span>1/2 tsp salt</span></p>
</td>
</tr>
<tr style='height:22.75pt'>
<td width=194 style='width:2.7in;border:solid windowtext 1.0pt;border-top:
none;padding:0in 5.4pt 0in 5.4pt;height:22.75pt'>
<p><span>1 tsp sugar</span></p>
</td>
</tr>
<tr style='height:22.75pt'>
<td width=194 style='width:2.7in;border:solid windowtext 1.0pt;border-top:
none;padding:0in 5.4pt 0in 5.4pt;height:22.75pt'>
<p><span>1/2 tsp msg (optional)</span></p>
</td>
</tr>
<tr style='height:22.75pt'>
<td width=194 style='width:2.7in;border:solid windowtext 1.0pt;border-top:
none;padding:0in 5.4pt 0in 5.4pt;height:22.75pt'>
<p><span>2 lbs opo</span></p>
</td>
<td width=348 style='width:347.5pt;border-top:none;border-left:none;
border-bottom:solid windowtext 1.0pt;border-right:solid windowtext 1.0pt;
padding:0in 5.4pt 0in 5.4pt;height:22.75pt'>
<p><span>7. Peel, cut in half and
cut into 1/4” half moon pieces. </span></p>
<p><span>8. Add the opo to the
broth and cook until the water comes back to a boil, skimming as needed.</span></p>
<p><span>9. Turn off heat.</span></p>
</td>
</tr>
<tr style='height:22.75pt'>
<td width=194 style='width:2.7in;border:solid windowtext 1.0pt;border-top:
none;padding:0in 5.4pt 0in 5.4pt;height:22.75pt'>
<p><span>Cilantro, chopped</span></p>
</td>
<td width=348 rowspan=2 style='width:347.5pt;border-top:none;border-left:
none;border-bottom:solid windowtext 1.0pt;border-right:solid windowtext 1.0pt;
padding:0in 5.4pt 0in 5.4pt;height:22.75pt'>
<p><span>10. Wait for 10 minutes
and serve with cilantro and scallions.</span></p>
<p><span> </span></p>
<p><span>(NOTE: The 10 minute wait
will allow the opo to soften in the residual heat of the broth.)</span></p>
</td>
</tr>
<tr style='height:22.75pt'>
<td width=194 style='width:2.7in;border:solid windowtext 1.0pt;border-top:
none;padding:0in 5.4pt 0in 5.4pt;height:22.75pt'>
<p><span>Scallions, chopped</span></p>
</td>
</tr>
</table>
Moist Banana Bundt Cake With Cream Cheese Icing (high Altitude)2016-02-19T00:00:00+00:00http://fobesfamily.com/2016/02/19/moist-banana-bundt-cake-with-cream-cheese-icing-(high-altitude)<p><img src="https://fobesfamily.com/assets/images/2016/02/20151111-DSC_4754.jpg" alt="" /></p>
<p align=center style='text-align:center'><span>(Servings 12)</span></p>
<p style='text-indent:.5in'><span>I
am so excited to have another baking recipe for blog! Now that my daughter is
on more of a solid diet this past year, I’ve been trying introduce her to lots
of new foods and flavors as well as instill a love of fruit and vegetables.
Like any other two years old, she has a temperamental love of different foods. She’ll
want to eat something everyday for a week and then all of a sudden it’s the
most disgusting thing in the world to her. One of the most frustrating part of
it all is she’ll ask for something that we don’t have for a few days, then once
we get it she is no longer interested. This is what constantly happens with
bananas. I’ll buy two, she’ll eat it all in a day and want more. I buy six and
she wants nothing to do with them…</span></p>
<p><img src="https://fobesfamily.com/assets/images/2016/02/20151111-DSC_4723.jpg" alt="" />
<img src="https://fobesfamily.com/assets/images/2016/02/20151111-DSC_4720.jpg" alt="" /></p>
<p style='text-indent:.5in'><span>So
what else should I do with bananas that are extremely over ripened but do some
experimental baking right? I know, any excuse to break out the mixer and turn
on the oven. I guess, thanks to Evie, I have another great recipe for my blog.
This banana bundt cake is extremely moist and pairs exceptionally well with a
cream cheese-based icing. And hey, there are bananas in it so it’s healthier,
no? I don’t like throwing away money so being able to salvage the bananas this
way is a perk not to mention the delicious benefits. </span></p>
<p><img src="https://fobesfamily.com/assets/images/2016/02/20151111-DSC_4724.jpg" alt="" />
<img src="https://fobesfamily.com/assets/images/2016/02/20151111-DSC_4747.jpg" alt="" /></p>
<p style='text-indent:.5in'><span>This
is so fast and easy to whip up. The crunchy outer layer is a great contrast to
the soft and moist center of the cake. If you’re like me and have some overly
ripened bananas, why not test out this recipe and let me know what you think?
Oh, and do not forget the cream cheese icing, it really brings this cake to a
whole new level!</span></p>
<p><img src="https://fobesfamily.com/assets/images/2016/02/20151112-DSC_4788.jpg" alt="" /></p>
<table class=MsoTableGrid border=1 cellspacing=0 cellpadding=0 width=543
style='width:543.1pt;border-collapse:collapse;border:none'>
<tr style='height:26.8pt'>
<td width=257 style='width:257.4pt;border:solid windowtext 1.0pt;padding:
0in 5.4pt 0in 5.4pt;height:26.8pt'>
<p><span>1 cup + 3.5 tbsps
all-purpose flour</span></p>
</td>
<td width=286 rowspan=3 style='width:285.7pt;border:solid windowtext 1.0pt;
border-left:none;padding:0in 5.4pt 0in 5.4pt;height:26.8pt'>
<p><span>1. Mix all ingredients
well and set aside.</span></p>
</td>
</tr>
<tr style='height:26.8pt'>
<td width=257 style='width:257.4pt;border:solid windowtext 1.0pt;border-top:
none;padding:0in 5.4pt 0in 5.4pt;height:26.8pt'>
<p><span>1/2 tsp baking soda</span></p>
</td>
</tr>
<tr style='height:26.8pt'>
<td width=257 style='width:257.4pt;border:solid windowtext 1.0pt;border-top:
none;padding:0in 5.4pt 0in 5.4pt;height:26.8pt'>
<p><span>1/8 tsp salt</span></p>
</td>
</tr>
<tr style='height:26.8pt'>
<td width=257 style='width:257.4pt;border:solid windowtext 1.0pt;border-top:
none;padding:0in 5.4pt 0in 5.4pt;height:26.8pt'>
<p><span>4 tbsps butter, unsalted
and softened</span></p>
</td>
<td width=286 style='width:285.7pt;border-top:none;border-left:none;
border-bottom:solid windowtext 1.0pt;border-right:solid windowtext 1.0pt;
padding:0in 5.4pt 0in 5.4pt;height:26.8pt'>
<p><span>2. In a separate bowl,
cream the butter.</span></p>
</td>
</tr>
<tr style='height:26.8pt'>
<td width=257 style='width:257.4pt;border:solid windowtext 1.0pt;border-top:
none;padding:0in 5.4pt 0in 5.4pt;height:26.8pt'>
<p><span>3/4 cup sugar</span></p>
</td>
<td width=286 style='width:285.7pt;border-top:none;border-left:none;
border-bottom:solid windowtext 1.0pt;border-right:solid windowtext 1.0pt;
padding:0in 5.4pt 0in 5.4pt;height:26.8pt'>
<p><span>3. Add in the sugar and
mix until blended.</span></p>
</td>
</tr>
<tr style='height:26.8pt'>
<td width=257 style='width:257.4pt;border:solid windowtext 1.0pt;border-top:
none;padding:0in 5.4pt 0in 5.4pt;height:26.8pt'>
<p><span>2 large eggs</span></p>
</td>
<td width=286 style='width:285.7pt;border-top:none;border-left:none;
border-bottom:solid windowtext 1.0pt;border-right:solid windowtext 1.0pt;
padding:0in 5.4pt 0in 5.4pt;height:26.8pt'>
<p><span>4. Add one egg at a time and
mix until just incorporated.</span></p>
</td>
</tr>
<tr style='height:26.8pt'>
<td width=257 style='width:257.4pt;border:solid windowtext 1.0pt;border-top:
none;padding:0in 5.4pt 0in 5.4pt;height:26.8pt'>
<p><span>1 tsp vanilla extract</span></p>
</td>
<td width=286 style='width:285.7pt;border-top:none;border-left:none;
border-bottom:solid windowtext 1.0pt;border-right:solid windowtext 1.0pt;
padding:0in 5.4pt 0in 5.4pt;height:26.8pt'>
<p><span>5. Stir in the vanilla
extract.</span></p>
</td>
</tr>
<tr style='height:26.8pt'>
<td width=257 style='width:257.4pt;border:solid windowtext 1.0pt;border-top:
none;padding:0in 5.4pt 0in 5.4pt;height:26.8pt'>
<p><span>3/4 cup buttermilk</span></p>
</td>
<td width=286 style='width:285.7pt;border-top:none;border-left:none;
border-bottom:solid windowtext 1.0pt;border-right:solid windowtext 1.0pt;
padding:0in 5.4pt 0in 5.4pt;height:26.8pt'>
<p><span>6. Alternating between the
flour and buttermilk, mixing half at a time into the butter mixture until
incorporated.</span></p>
</td>
</tr>
<tr style='height:26.8pt'>
<td width=257 style='width:257.4pt;border:solid windowtext 1.0pt;border-top:
none;padding:0in 5.4pt 0in 5.4pt;height:26.8pt'>
<p><span>1/2 cup banana, mashed
(about 1.5 bananas)</span></p>
</td>
<td width=286 rowspan=2 style='width:285.7pt;border-top:none;border-left:
none;border-bottom:solid windowtext 1.0pt;border-right:solid windowtext 1.0pt;
padding:0in 5.4pt 0in 5.4pt;height:26.8pt'>
<p><span>7. Stir the bananas and
lemon juice into the batter until well blended.</span></p>
<p><span>8. In a well buttered and
floured bundt pan, pour in the batter.</span></p>
<p><span>9. Bake at 300F for about
60 minutes until a toothpick comes out clean.</span></p>
<p><span>10. Place directly into
the freezer for 30 minutes.</span></p>
<p><span> </span></p>
<p><span>(Placing it in the freezer
will help create a cake that is moister.)</span></p>
<p><span> </span></p>
<p><span>11. Remove from freezer,
de-mold, frost (if desired) and serve.</span></p>
</td>
</tr>
<tr style='height:26.8pt'>
<td width=257 style='width:257.4pt;border:solid windowtext 1.0pt;border-top:
none;padding:0in 5.4pt 0in 5.4pt;height:26.8pt'>
<p><span>1 tbsp lemon juice</span></p>
</td>
</tr>
</table>
<table class=MsoTableGrid border=1 cellspacing=0 cellpadding=0 width=543
style='width:543.1pt;border-collapse:collapse;border:none'>
<tr style='height:44.45pt'>
<td width=543 colspan=2 style='width:543.1pt;border:solid windowtext 1.0pt;
padding:0in 5.4pt 0in 5.4pt;height:44.45pt'>
<p align=center style='text-align:center'><span
>Cream Cheese Icing</span></p>
</td>
</tr>
<tr style='height:44.45pt'>
<td width=272 style='width:271.55pt;border:solid windowtext 1.0pt;border-top:
none;padding:0in 5.4pt 0in 5.4pt;height:44.45pt'>
<p><span>4 tbsps butter, unsalted
and softened</span></p>
</td>
<td width=272 rowspan=2 style='width:271.55pt;border-top:none;border-left:
none;border-bottom:solid windowtext 1.0pt;border-right:solid windowtext 1.0pt;
padding:0in 5.4pt 0in 5.4pt;height:44.45pt'>
<p><span>1. Cream together.</span></p>
</td>
</tr>
<tr style='height:44.45pt'>
<td width=272 style='width:271.55pt;border:solid windowtext 1.0pt;border-top:
none;padding:0in 5.4pt 0in 5.4pt;height:44.45pt'>
<p><span>8 oz cream cheese, room
temperature</span></p>
</td>
</tr>
<tr style='height:44.45pt'>
<td width=272 style='width:271.55pt;border:solid windowtext 1.0pt;border-top:
none;padding:0in 5.4pt 0in 5.4pt;height:44.45pt'>
<p><span>1 tsp vanilla extract</span></p>
</td>
<td width=272 style='width:271.55pt;border-top:none;border-left:none;
border-bottom:solid windowtext 1.0pt;border-right:solid windowtext 1.0pt;
padding:0in 5.4pt 0in 5.4pt;height:44.45pt'>
<p><span>2. Add vanilla extract.</span></p>
</td>
</tr>
<tr style='height:44.45pt'>
<td width=272 style='width:271.55pt;border:solid windowtext 1.0pt;border-top:
none;padding:0in 5.4pt 0in 5.4pt;height:44.45pt'>
<p><span>3 cups powdered sugar</span></p>
</td>
<td width=272 style='width:271.55pt;border-top:none;border-left:none;
border-bottom:solid windowtext 1.0pt;border-right:solid windowtext 1.0pt;
padding:0in 5.4pt 0in 5.4pt;height:44.45pt'>
<p><span>3. Slowly mix in the
powdered sugar until well incorporated. </span></p>
</td>
</tr>
</table>
Loaded Chicken Bacon Pumpkin Pasta Bake2016-02-19T00:00:00+00:00http://fobesfamily.com/2016/02/19/loaded-chicken-bacon-pumpkin-pasta-bake<p><img src="https://fobesfamily.com/assets/images/2016/02/20151111-DSC_4756.jpg" alt="" /></p>
<p align=center style='text-align:center'><span>(Servings 8)</span></p>
<p style='text-indent:.5in'><span>I
don’t know about you, but when the cold season starts to approach I
automatically go into baking mode. And baked I did since October, testing out a
series of pumpkin flavored baked goods because once November hits, everyone
wants pumpkin flavored everything! Of course, amongst the sweets I had to throw
in some savory to create a semblance of balance. This lead to my Loaded
Chicken-Bacon Pumpkin Pasta Bake. </span></p>
<p><img src="https://fobesfamily.com/assets/images/2016/02/20151111-DSC_4731.jpg" alt="" /></p>
<p style='text-indent:.5in'><span>Though
the recipe is a little more intricate, it’ll be a great dish to bring to a
thanksgiving potluck. The baked pasta has a crunchy top while the sauce is kept
creamy with lots of pumpkin flavor coming through with every bite. </span></p>
<p><img src="https://fobesfamily.com/assets/images/2016/02/20151111-DSC_4733.jpg" alt="" />
<img src="https://fobesfamily.com/assets/images/2016/02/20151111-DSC_4737.jpg" alt="" /></p>
<p style='text-indent:.5in'><span>Personally,
this dish was a perfect way for me to use leftover Thanksgiving ingredients and
stretch out the Thanksgiving celebration further. I hope this recipe makes it
into one of your November meals! </span></p>
<p><img src="https://fobesfamily.com/assets/images/2016/02/20151111-DSC_4743.jpg" alt="" />
<img src="https://fobesfamily.com/assets/images/2016/02/20151111-DSC_4749.jpg" alt="" /></p>
<table class=MsoTableGrid border=1 cellspacing=0 cellpadding=0 width=542
style='width:541.9pt;border-collapse:collapse;border:none'>
<tr style='height:22.6pt'>
<td width=217 style='width:216.9pt;border:solid windowtext 1.0pt;padding:
0in 5.4pt 0in 5.4pt;height:22.6pt'>
<p><span>1 lb chicken thighs</span></p>
</td>
<td width=325 style='width:325.0pt;border:solid windowtext 1.0pt;border-left:
none;padding:0in 5.4pt 0in 5.4pt;height:22.6pt'>
<p><span>1. Boiled for about 10
minutes and shredded.</span></p>
</td>
</tr>
<tr style='height:22.2pt'>
<td width=217 style='width:216.9pt;border:solid windowtext 1.0pt;border-top:
none;padding:0in 5.4pt 0in 5.4pt;height:22.2pt'>
<p><span>1/2 lb bacon, chopped into
1” pieces</span></p>
</td>
<td width=325 style='width:325.0pt;border-top:none;border-left:none;
border-bottom:solid windowtext 1.0pt;border-right:solid windowtext 1.0pt;
padding:0in 5.4pt 0in 5.4pt;height:22.2pt'>
<p><span>2. On medium-low heat,
render the bacon until crispy in a pan.</span></p>
<p><span>3. Set the bacon aside,
reserving the bacon fat.</span></p>
</td>
</tr>
<tr style='height:22.2pt'>
<td width=217 style='width:216.9pt;border:solid windowtext 1.0pt;border-top:
none;padding:0in 5.4pt 0in 5.4pt;height:22.2pt'>
<p><span>1 lb penne, slightly
undercooked</span></p>
</td>
<td width=325 rowspan=2 style='width:325.0pt;border-top:none;border-left:
none;border-bottom:solid windowtext 1.0pt;border-right:solid windowtext 1.0pt;
padding:0in 5.4pt 0in 5.4pt;height:22.2pt'>
<p><span>4. Toss the pasta,
chicken, bacon and mozzarella together and set aside.</span></p>
</td>
</tr>
<tr style='height:22.2pt'>
<td width=217 style='width:216.9pt;border:solid windowtext 1.0pt;border-top:
none;padding:0in 5.4pt 0in 5.4pt;height:22.2pt'>
<p><span>8 oz mozzarella, cut into
1/3” cubes</span></p>
</td>
</tr>
<tr style='height:22.2pt'>
<td width=217 style='width:216.9pt;border:solid windowtext 1.0pt;border-top:
none;padding:0in 5.4pt 0in 5.4pt;height:22.2pt'>
<p><span>6 garlic cloves</span></p>
</td>
<td width=325 rowspan=9 style='width:325.0pt;border-top:none;border-left:
none;border-bottom:solid windowtext 1.0pt;border-right:solid windowtext 1.0pt;
padding:0in 5.4pt 0in 5.4pt;height:22.2pt'>
<p><span>5. Add all the seasoning
for the sauce into a blender and blend well and set aside.</span></p>
</td>
</tr>
<tr style='height:22.2pt'>
<td width=217 style='width:216.9pt;border:solid windowtext 1.0pt;border-top:
none;padding:0in 5.4pt 0in 5.4pt;height:22.2pt'>
<p><span>15 oz pumpkin puree</span></p>
</td>
</tr>
<tr style='height:22.2pt'>
<td width=217 style='width:216.9pt;border:solid windowtext 1.0pt;border-top:
none;padding:0in 5.4pt 0in 5.4pt;height:22.2pt'>
<p><span>1 1/4 cup chicken broth</span></p>
</td>
</tr>
<tr style='height:22.2pt'>
<td width=217 style='width:216.9pt;border:solid windowtext 1.0pt;border-top:
none;padding:0in 5.4pt 0in 5.4pt;height:22.2pt'>
<p><span>1 cup whole milk</span></p>
</td>
</tr>
<tr style='height:22.2pt'>
<td width=217 style='width:216.9pt;border:solid windowtext 1.0pt;border-top:
none;padding:0in 5.4pt 0in 5.4pt;height:22.2pt'>
<p><span>1/4 cup olive oil</span></p>
</td>
</tr>
<tr style='height:22.2pt'>
<td width=217 style='width:216.9pt;border:solid windowtext 1.0pt;border-top:
none;padding:0in 5.4pt 0in 5.4pt;height:22.2pt'>
<p><span>1 tsp nutmeg, ground</span></p>
</td>
</tr>
<tr style='height:22.2pt'>
<td width=217 style='width:216.9pt;border:solid windowtext 1.0pt;border-top:
none;padding:0in 5.4pt 0in 5.4pt;height:22.2pt'>
<p><span>1 1/2 tbsps salt</span></p>
</td>
</tr>
<tr style='height:22.2pt'>
<td width=217 style='width:216.9pt;border:solid windowtext 1.0pt;border-top:
none;padding:0in 5.4pt 0in 5.4pt;height:22.2pt'>
<p><span>1 tsp black pepper</span></p>
</td>
</tr>
<tr style='height:22.2pt'>
<td width=217 style='width:216.9pt;border:solid windowtext 1.0pt;border-top:
none;padding:0in 5.4pt 0in 5.4pt;height:22.2pt'>
<p><span>1 tbsp sugar</span></p>
</td>
</tr>
<tr style='height:22.2pt'>
<td width=217 style='width:216.9pt;border:solid windowtext 1.0pt;border-top:
none;padding:0in 5.4pt 0in 5.4pt;height:22.2pt'>
<p><span>3 tbsps of bacon fat or
butter</span></p>
</td>
<td width=325 rowspan=2 style='width:325.0pt;border-top:none;border-left:
none;border-bottom:solid windowtext 1.0pt;border-right:solid windowtext 1.0pt;
padding:0in 5.4pt 0in 5.4pt;height:22.2pt'>
<p><span>6. On medium-low heat,
caramelize the onion in the bacon fat or butter for about 30 minutes or the
onion is golden. Be sure to stir occasionally.</span></p>
</td>
</tr>
<tr style='height:22.2pt'>
<td width=217 style='width:216.9pt;border:solid windowtext 1.0pt;border-top:
none;padding:0in 5.4pt 0in 5.4pt;height:22.2pt'>
<p><span>1 large yellow onion,
sliced thinly</span></p>
</td>
</tr>
<tr style='height:22.2pt'>
<td width=217 style='width:216.9pt;border:solid windowtext 1.0pt;border-top:
none;padding:0in 5.4pt 0in 5.4pt;height:22.2pt'>
<p><span>2 tbsps sherry cooking
wine</span></p>
</td>
<td width=325 style='width:325.0pt;border-top:none;border-left:none;
border-bottom:solid windowtext 1.0pt;border-right:solid windowtext 1.0pt;
padding:0in 5.4pt 0in 5.4pt;height:22.2pt'>
<p><span>7. When the onions are
almost done, stir in the sherry to enhance the flavor.</span></p>
<p><span>8. Pour the pumpkin sauce
into the pan and cook until the sauce is heated through.</span></p>
<p><span>9. Toss the pasta mix into
the pan and stir until well incorporated.</span></p>
<p><span>10. Transfer everything
into a greased 9x13 baking dish.</span></p>
</td>
</tr>
<tr style='height:22.2pt'>
<td width=217 style='width:216.9pt;border:solid windowtext 1.0pt;border-top:
none;padding:0in 5.4pt 0in 5.4pt;height:22.2pt'>
<p><span>1/2 cup pecorino romano,
shredded</span></p>
</td>
<td width=325 style='width:325.0pt;border-top:none;border-left:none;
border-bottom:solid windowtext 1.0pt;border-right:solid windowtext 1.0pt;
padding:0in 5.4pt 0in 5.4pt;height:22.2pt'>
<p><span>11. Sprinkle on the pasta
and cover with a greased foil.</span></p>
<p><span>12. Bake at 350F for about
30 minutes.</span></p>
<p><span>13. Remove from oven and
let sit for about 5 minutes.</span></p>
</td>
</tr>
<tr style='height:22.2pt'>
<td width=217 style='width:216.9pt;border:solid windowtext 1.0pt;border-top:
none;padding:0in 5.4pt 0in 5.4pt;height:22.2pt'>
<p><span>Parsley, chopped</span></p>
</td>
<td width=325 style='width:325.0pt;border-top:none;border-left:none;
border-bottom:solid windowtext 1.0pt;border-right:solid windowtext 1.0pt;
padding:0in 5.4pt 0in 5.4pt;height:22.2pt'>
<p><span>14. Top with parsley and
serve warm. </span></p>
</td>
</tr>
</table>
Baked Mint Pomegranate Tilapia Fillets2016-01-28T00:00:00+00:00http://fobesfamily.com/2016/01/28/baked-mint-pomegranate-tilapia-fillets<p><img src="https://fobesfamily.com/assets/images/2016/01/20151109-DSC_4708.jpg" alt="" /></p>
<p align=center style='text-align:center'><span>(Serves 4)</span></p>
<p style='text-indent:.5in'><span>My
husband has never been very interested in fish dishes. I, on the other hand,
just can’t get enough. So I’m constantly thinking of new ways to make fish to
introduce to our dinners. It just so happened that I had some pomegranate and
tilapia fillets laying around to experiment with in the kitchen. Turns out, the
experiment was rather tasty.</span></p>
<p><img src="https://fobesfamily.com/assets/images/2016/01/20151109-DSC_4666.jpg" alt="" />
<img src="https://fobesfamily.com/assets/images/2016/01/20151109-DSC_4670.jpg" alt="" /></p>
<p style='text-indent:.5in'><span>This
past Spring I started cultivating some indoor herbs that I had purchased from
the Farmer’s Market. I’ve had remarkable luck with some and tremendous failures
with others. Mint was not only a survivor but is thriving and in great need of
a trim. And since mint pairs amazingly well with pomegranate, I had to
incorporate it into the recipe. My herb got a nice trim, the dish got another
depth of flavor and nothing went to waste. I’d say that’s a win, right? </span></p>
<p><img src="https://fobesfamily.com/assets/images/2016/01/20151109-DSC_4678.jpg" alt="" />
<img src="https://fobesfamily.com/assets/images/2016/01/20151109-DSC_4687.jpg" alt="" /></p>
<p style='text-indent:.5in'><span>Tasty
is one thing, but lately I’ve been wanting easy and quick dinner recipes and
this Baked Mint-Pomegranate Tilapia Fillet just happens to fit the bill. Blend
all the marinade ingredients, make a panko crust and bake. The results speak
for itself. Crispy crust, flavorful flaky fish and the color contrasts gives
the eyes a treat. </span></p>
<p><img src="https://fobesfamily.com/assets/images/2016/01/20151109-DSC_4675.jpg" alt="" />
<img src="https://fobesfamily.com/assets/images/2016/01/20151109-DSC_4684.jpg" alt="" /></p>
<table class=MsoTableGrid border=1 cellspacing=0 cellpadding=0 width=533
style='width:533.3pt;border-collapse:collapse;border:none'>
<tr style='height:23.75pt'>
<td width=212 style='width:2.95in;border:solid windowtext 1.0pt;padding:0in 5.4pt 0in 5.4pt;
height:23.75pt'>
<p><span>1 cup pomegranate arils
(seeds)</span></p>
</td>
<td width=321 rowspan=9 style='width:320.9pt;border:solid windowtext 1.0pt;
border-left:none;padding:0in 5.4pt 0in 5.4pt;height:23.75pt'>
<p><span>1. Blend the marinade
ingredients together. </span></p>
<p><span> </span></p>
<p><span>(NOTE: This makes about 1
1/4 cup of marinade.)</span></p>
</td>
</tr>
<tr style='height:22.8pt'>
<td width=212 style='width:2.95in;border:solid windowtext 1.0pt;border-top:
none;padding:0in 5.4pt 0in 5.4pt;height:22.8pt'>
<p><span>2 tbsps balsamic vinegar</span></p>
</td>
</tr>
<tr style='height:22.8pt'>
<td width=212 style='width:2.95in;border:solid windowtext 1.0pt;border-top:
none;padding:0in 5.4pt 0in 5.4pt;height:22.8pt'>
<p><span>2 tbsps mint, fresh</span></p>
</td>
</tr>
<tr style='height:22.8pt'>
<td width=212 style='width:2.95in;border:solid windowtext 1.0pt;border-top:
none;padding:0in 5.4pt 0in 5.4pt;height:22.8pt'>
<p><span>1 tbsp agave nectar</span></p>
</td>
</tr>
<tr style='height:22.8pt'>
<td width=212 style='width:2.95in;border:solid windowtext 1.0pt;border-top:
none;padding:0in 5.4pt 0in 5.4pt;height:22.8pt'>
<p><span>2 tbsps olive oil</span></p>
</td>
</tr>
<tr style='height:22.8pt'>
<td width=212 style='width:2.95in;border:solid windowtext 1.0pt;border-top:
none;padding:0in 5.4pt 0in 5.4pt;height:22.8pt'>
<p><span>1/2 tsp salt</span></p>
</td>
</tr>
<tr style='height:22.8pt'>
<td width=212 style='width:2.95in;border:solid windowtext 1.0pt;border-top:
none;padding:0in 5.4pt 0in 5.4pt;height:22.8pt'>
<p><span>1/4 tsp black pepper</span></p>
</td>
</tr>
<tr style='height:22.8pt'>
<td width=212 style='width:2.95in;border:solid windowtext 1.0pt;border-top:
none;padding:0in 5.4pt 0in 5.4pt;height:22.8pt'>
<p><span>2 tbsps lemon juice</span></p>
</td>
</tr>
<tr style='height:22.8pt'>
<td width=212 style='width:2.95in;border:solid windowtext 1.0pt;border-top:
none;padding:0in 5.4pt 0in 5.4pt;height:22.8pt'>
<p><span>1/2 tsp paprika</span></p>
</td>
</tr>
<tr style='height:22.8pt'>
<td width=212 style='width:2.95in;border:solid windowtext 1.0pt;border-top:
none;padding:0in 5.4pt 0in 5.4pt;height:22.8pt'>
<p><span>4 tilapia fillets</span></p>
</td>
<td width=321 style='width:320.9pt;border-top:none;border-left:none;
border-bottom:solid windowtext 1.0pt;border-right:solid windowtext 1.0pt;
padding:0in 5.4pt 0in 5.4pt;height:22.8pt'>
<p><span>2. Clean and pat dry.</span></p>
<p><span>3. Place in a gallon size
Ziploc bag and pour in the marinade.</span></p>
<p><span>4. Gently massage the
marinade into the fillets to ensure complete coating.</span></p>
<p><span>5. Let marinate in the
refrigerator for at least 1 hour or up to 24 hours prior to cooking.</span></p>
</td>
</tr>
<tr style='height:22.8pt'>
<td width=212 style='width:2.95in;border:solid windowtext 1.0pt;border-top:
none;padding:0in 5.4pt 0in 5.4pt;height:22.8pt'>
<p><span>1 cup panko</span></p>
</td>
<td width=321 rowspan=4 style='width:320.9pt;border-top:none;border-left:
none;border-bottom:solid windowtext 1.0pt;border-right:solid windowtext 1.0pt;
padding:0in 5.4pt 0in 5.4pt;height:22.8pt'>
<p><span>6. In a small bowl, mix
these ingredients together well.</span></p>
</td>
</tr>
<tr style='height:22.8pt'>
<td width=212 style='width:2.95in;border:solid windowtext 1.0pt;border-top:
none;padding:0in 5.4pt 0in 5.4pt;height:22.8pt'>
<p><span>1 tsp mint flakes, dried</span></p>
</td>
</tr>
<tr style='height:22.8pt'>
<td width=212 style='width:2.95in;border:solid windowtext 1.0pt;border-top:
none;padding:0in 5.4pt 0in 5.4pt;height:22.8pt'>
<p><span>1/2 tsp salt</span></p>
</td>
</tr>
<tr style='height:22.8pt'>
<td width=212 style='width:2.95in;border:solid windowtext 1.0pt;border-top:
none;padding:0in 5.4pt 0in 5.4pt;height:22.8pt'>
<p><span>1/2 tsp paprika</span></p>
</td>
</tr>
<tr style='height:22.8pt'>
<td width=212 style='width:2.95in;border:solid windowtext 1.0pt;border-top:
none;padding:0in 5.4pt 0in 5.4pt;height:22.8pt'>
<p><span>1 egg, beaten</span></p>
</td>
<td width=321 style='width:320.9pt;border-top:none;border-left:none;
border-bottom:solid windowtext 1.0pt;border-right:solid windowtext 1.0pt;
padding:0in 5.4pt 0in 5.4pt;height:22.8pt'>
<p><span>7. Incorporate the egg into
the panko mix. </span></p>
</td>
</tr>
<tr style='height:22.8pt'>
<td width=212 style='width:2.95in;border:solid windowtext 1.0pt;border-top:
none;padding:0in 5.4pt 0in 5.4pt;height:22.8pt'>
<p><span>~2 tbsps olive oil</span></p>
</td>
<td width=321 style='width:320.9pt;border-top:none;border-left:none;
border-bottom:solid windowtext 1.0pt;border-right:solid windowtext 1.0pt;
padding:0in 5.4pt 0in 5.4pt;height:22.8pt'>
<p><span>8. Drizzle in the olive
oil as needed to form a puddy-like consistency.</span></p>
</td>
</tr>
<tr style='height:22.8pt'>
<td width=212 style='width:2.95in;border:solid windowtext 1.0pt;border-top:
none;padding:0in 5.4pt 0in 5.4pt;height:22.8pt'>
<p><span>1 tbsp olive oil</span></p>
</td>
<td width=321 style='width:320.9pt;border-top:none;border-left:none;
border-bottom:solid windowtext 1.0pt;border-right:solid windowtext 1.0pt;
padding:0in 5.4pt 0in 5.4pt;height:22.8pt'>
<p><span>9. Cover a baking pan with
foil and coat with olive oil.</span></p>
<p><span>10. Reserving the
marinade, lay the fillet in a single layer in the pan.</span></p>
<p><span>11. Divide panko mix into
four portions and firmly press it onto the fillets to create an even crust.</span></p>
<p><span>12. Bake at 375F for about
30 minutes until the fish is done.</span></p>
<p><span>13. If the crust’s color
is not golden enough, you can place it under the broiler on low for about 3
minutes to reach the desired color.</span></p>
<p><span> </span></p>
<p><span>(NOTE: Keep a close eye on
the fish when under the broiler as a golden crust can quickly turn into a
burnt crust.)</span></p>
</td>
</tr>
<tr style='height:22.8pt'>
<td width=212 style='width:2.95in;border:solid windowtext 1.0pt;border-top:
none;padding:0in 5.4pt 0in 5.4pt;height:22.8pt'>
<p><span>1/2 tbsp cornstarch</span></p>
</td>
<td width=321 style='width:320.9pt;border-top:none;border-left:none;
border-bottom:solid windowtext 1.0pt;border-right:solid windowtext 1.0pt;
padding:0in 5.4pt 0in 5.4pt;height:22.8pt'>
<p><span>14. On medium high heat,
add the cornstarch to a saucepan and slowly whisk in the reserved marinade.</span></p>
<p><span>15. Whisk continuously until
thickened (about 5 minutes) and turn off the heat.</span></p>
</td>
</tr>
<tr style='height:22.8pt'>
<td width=212 style='width:2.95in;border:solid windowtext 1.0pt;border-top:
none;padding:0in 5.4pt 0in 5.4pt;height:22.8pt'>
<p><span>1 tbsp butter, unsalted</span></p>
</td>
<td width=321 style='width:320.9pt;border-top:none;border-left:none;
border-bottom:solid windowtext 1.0pt;border-right:solid windowtext 1.0pt;
padding:0in 5.4pt 0in 5.4pt;height:22.8pt'>
<p><span>16. Mix in the butter
until dissolved.</span></p>
</td>
</tr>
<tr style='height:22.8pt'>
<td width=212 style='width:2.95in;border:solid windowtext 1.0pt;border-top:
none;padding:0in 5.4pt 0in 5.4pt;height:22.8pt'>
<p><span>1/2 cup pomegranate arils</span></p>
</td>
<td width=321 style='width:320.9pt;border-top:none;border-left:none;
border-bottom:solid windowtext 1.0pt;border-right:solid windowtext 1.0pt;
padding:0in 5.4pt 0in 5.4pt;height:22.8pt'>
<p><span>17. Gently stir in the
arils.</span></p>
<p><span>18. Adjust to taste.</span></p>
</td>
</tr>
</table>
Apricot Chicken2016-01-28T00:00:00+00:00http://fobesfamily.com/2016/01/28/apricot-chicken<p><img src="https://fobesfamily.com/assets/images/2016/01/20151107-DSC_4663.jpg" alt="" /></p>
<p align=center style='text-align:center'><span>(Servings 8)</span></p>
<p style='text-indent:.5in'><span>On
our last trip to Costco, I had purchased a large bag of dried apricots on a
whim. Now that I have it, I’m not sure what I want to do with it. So I decided
to incorporate it in a new chicken recipe. The tartness of the apricot
compliments the chicken an spices quite pleasantly. </span></p>
<p><img src="https://fobesfamily.com/assets/images/2016/01/20151107-DSC_4635.jpg" alt="" /></p>
<p style='text-indent:.5in'><span>During
the cold winter months, I do enjoy cooking with the oven. Not only does it warm
up the house, it also gives me a lot more down time. One of the many reasons
why I like this recipe is that once I have everything prepped and ready to go,
it takes just a few minutes to assemble and pop into the oven. Set it and
forget it!</span></p>
<p><img src="https://fobesfamily.com/assets/images/2016/01/20151107-DSC_4624.jpg" alt="" />
<img src="https://fobesfamily.com/assets/images/2016/01/20151107-DSC_4641.jpg" alt="" /></p>
<p style='text-indent:.5in'><span> The
apricot is very prominent in this dish so if you want the apricot flavor to be
more subtle, feel free to reduce the amount of dried apricots you use. The
cooking time in the oven allows the apricot to thoroughly infuse the chicken as
well as keeping the meat tender and moist. The sauce it produces would be
suitably complimented with rice or bread. </span></p>
<p><img src="https://fobesfamily.com/assets/images/2016/01/20151107-DSC_4654.jpg" alt="" /></p>
<table class=MsoTableGrid border=1 cellspacing=0 cellpadding=0 width=552
style='width:552.05pt;border-collapse:collapse;border:none'>
<tr style='height:25.25pt'>
<td width=180 style='width:179.65pt;border:solid windowtext 1.0pt;padding:
0in 5.4pt 0in 5.4pt;height:25.25pt'>
<p><span>4 lbs chicken thighs</span></p>
</td>
<td width=372 style='width:372.4pt;border:solid windowtext 1.0pt;border-left:
none;padding:0in 5.4pt 0in 5.4pt;height:25.25pt'>
<p><span>1. Trim and pat dry.</span></p>
</td>
</tr>
<tr style='height:25.25pt'>
<td width=180 style='width:179.65pt;border:solid windowtext 1.0pt;border-top:
none;padding:0in 5.4pt 0in 5.4pt;height:25.25pt'>
<p><span>1 tsp hot chili powder</span></p>
</td>
<td width=372 rowspan=6 style='width:372.4pt;border-top:none;border-left:
none;border-bottom:solid windowtext 1.0pt;border-right:solid windowtext 1.0pt;
padding:0in 5.4pt 0in 5.4pt;height:25.25pt'>
<p><span>2. Combine all the
seasoning and pat onto the chicken pieces.</span></p>
<p><span>3. Let marinate in the refrigerator
for at least 2 hours prior to cooking.</span></p>
</td>
</tr>
<tr style='height:25.25pt'>
<td width=180 style='width:179.65pt;border:solid windowtext 1.0pt;border-top:
none;padding:0in 5.4pt 0in 5.4pt;height:25.25pt'>
<p><span>2 tsps cumin</span></p>
</td>
</tr>
<tr style='height:25.25pt'>
<td width=180 style='width:179.65pt;border:solid windowtext 1.0pt;border-top:
none;padding:0in 5.4pt 0in 5.4pt;height:25.25pt'>
<p><span>2 tsps paprika </span></p>
</td>
</tr>
<tr style='height:25.25pt'>
<td width=180 style='width:179.65pt;border:solid windowtext 1.0pt;border-top:
none;padding:0in 5.4pt 0in 5.4pt;height:25.25pt'>
<p><span>2 tbsps salt, kosher</span></p>
</td>
</tr>
<tr style='height:25.25pt'>
<td width=180 style='width:179.65pt;border:solid windowtext 1.0pt;border-top:
none;padding:0in 5.4pt 0in 5.4pt;height:25.25pt'>
<p><span>1 tsp black pepper</span></p>
</td>
</tr>
<tr style='height:25.25pt'>
<td width=180 style='width:179.65pt;border:solid windowtext 1.0pt;border-top:
none;padding:0in 5.4pt 0in 5.4pt;height:25.25pt'>
<p><span>1 tsp garlic powder</span></p>
</td>
</tr>
<tr style='height:25.25pt'>
<td width=180 style='width:179.65pt;border:solid windowtext 1.0pt;border-top:
none;padding:0in 5.4pt 0in 5.4pt;height:25.25pt'>
<p><span>4 oz dried apricots, whole</span></p>
</td>
<td width=372 rowspan=2 style='width:372.4pt;border-top:none;border-left:
none;border-bottom:solid windowtext 1.0pt;border-right:solid windowtext 1.0pt;
padding:0in 5.4pt 0in 5.4pt;height:25.25pt'>
<p><span>4. Place the apricot in a
pot and pour in enough water to completely cover it.</span></p>
<p><span>5. Cover the pot and bring
the water to a boil and then lower to a simmer and cook for about 45 minutes
or until they are plump.</span></p>
<p><span>6. Set aside.</span></p>
</td>
</tr>
<tr style='height:25.25pt'>
<td width=180 style='width:179.65pt;border:solid windowtext 1.0pt;border-top:
none;padding:0in 5.4pt 0in 5.4pt;height:25.25pt'>
<p><span>Water</span></p>
</td>
</tr>
<tr style='height:25.25pt'>
<td width=180 style='width:179.65pt;border:solid windowtext 1.0pt;border-top:
none;padding:0in 5.4pt 0in 5.4pt;height:25.25pt'>
<p><span>2 tbsps butter</span></p>
</td>
<td width=372 rowspan=2 style='width:372.4pt;border-top:none;border-left:
none;border-bottom:solid windowtext 1.0pt;border-right:solid windowtext 1.0pt;
padding:0in 5.4pt 0in 5.4pt;height:25.25pt'>
<p><span>7. On medium-high heat,
warm the butter and oil in a dutch oven.</span></p>
</td>
</tr>
<tr style='height:25.25pt'>
<td width=180 style='width:179.65pt;border:solid windowtext 1.0pt;border-top:
none;padding:0in 5.4pt 0in 5.4pt;height:25.25pt'>
<p><span>2 tbsps olive oil</span></p>
</td>
</tr>
<tr style='height:25.25pt'>
<td width=180 style='width:179.65pt;border:solid windowtext 1.0pt;border-top:
none;padding:0in 5.4pt 0in 5.4pt;height:25.25pt'>
<p><span>1 large onion, cut into
medium wedges</span></p>
</td>
<td width=372 rowspan=2 style='width:372.4pt;border-top:none;border-left:
none;border-bottom:solid windowtext 1.0pt;border-right:solid windowtext 1.0pt;
padding:0in 5.4pt 0in 5.4pt;height:25.25pt'>
<p><span>8. Sauté onions and garlic
for about 3 minutes until soften.</span></p>
<p><span>9. Turn off heat.</span></p>
<p><span>10. Lay chicken in a
single layer on top of the onion and garlic.</span></p>
<p><span>11. Pour in the chicken
juices and apricot.</span></p>
<p><span>12. Cover and cook in the
oven at 350F for 70 minutes or until done.</span></p>
<p><span>13. Adjust seasoning and
serve hot. </span></p>
</td>
</tr>
<tr style='height:25.25pt'>
<td width=180 style='width:179.65pt;border:solid windowtext 1.0pt;border-top:
none;padding:0in 5.4pt 0in 5.4pt;height:25.25pt'>
<p><span>3 tbsps garlic, minced</span></p>
</td>
</tr>
</table>
Scallion Fried Eggs2016-01-13T00:00:00+00:00http://fobesfamily.com/2016/01/13/scallion-fried-eggs<p><img src="https://fobesfamily.com/assets/images/2016/01/20150529-DSC_3701.jpg" alt="" /></p>
<p align=center style='text-align:center'><span>(Serves 4)</span></p>
<p style='text-indent:.5in'><span>Eggs,
you can write a cookbook just about eggs. So versatile, it can be baked, fried,
steamed, boiled and the list can go on plus it’s tasty every which way! Scallion
Fried Eggs is my go-to dish when I want something fast and easy. It is
especially useful when my fridge is low on supplies when I am trying to clear
it out for a trip or just because I didn’t feel like going to the market. Great
as a side or a meal, you can’t go wrong here. It can be served hot or room
temperature, so if you’re looking to fill a bento box or just a meal on the go
look no further! The vibrant scallion green and vivid yellow contrast from the
egg yolk is a delight for the eyes, while the salty-sweet flavor complemented with
the fried texture of eggs is a treat for your taste buds!</span></p>
<p><span style='font-size:14.0pt'> </span></p>
<table class=MsoTableGrid border=1 cellspacing=0 cellpadding=0 width=518
style='width:518.15pt;border-collapse:collapse;border:none'>
<tr style='height:28.1pt'>
<td width=150 style='width:149.5pt;border:solid windowtext 1.0pt;padding:
0in 5.4pt 0in 5.4pt;height:28.1pt'>
<p><span>2 tbsps olive oil</span></p>
</td>
<td width=369 style='width:368.65pt;border:solid windowtext 1.0pt;border-left:
none;padding:0in 5.4pt 0in 5.4pt;height:28.1pt'>
<p><span>1. Heat a large non-stick
pan on high heat and add olive oil.</span></p>
</td>
</tr>
<tr style='height:28.1pt'>
<td width=150 style='width:149.5pt;border:solid windowtext 1.0pt;border-top:
none;padding:0in 5.4pt 0in 5.4pt;height:28.1pt'>
<p><span>4 eggs</span></p>
</td>
<td width=369 rowspan=6 style='width:368.65pt;border-top:none;border-left:
none;border-bottom:solid windowtext 1.0pt;border-right:solid windowtext 1.0pt;
padding:0in 5.4pt 0in 5.4pt;height:28.1pt'>
<p><span>2. In a medium size bowl
combine all ingredients together and mix well.</span></p>
</td>
</tr>
<tr style='height:28.1pt'>
<td width=150 style='width:149.5pt;border:solid windowtext 1.0pt;border-top:
none;padding:0in 5.4pt 0in 5.4pt;height:28.1pt'>
<p><span>_ tsp salt</span></p>
</td>
</tr>
<tr style='height:28.1pt'>
<td width=150 style='width:149.5pt;border:solid windowtext 1.0pt;border-top:
none;padding:0in 5.4pt 0in 5.4pt;height:28.1pt'>
<p><span>_ tsp sugar</span></p>
</td>
</tr>
<tr style='height:27.9pt'>
<td width=150 style='width:149.5pt;border:solid windowtext 1.0pt;border-top:
none;padding:0in 5.4pt 0in 5.4pt;height:27.9pt'>
<p><span>_ tsp msg (optional)</span></p>
</td>
</tr>
<tr style='height:27.9pt'>
<td width=150 style='width:149.5pt;border:solid windowtext 1.0pt;border-top:
none;padding:0in 5.4pt 0in 5.4pt;height:27.9pt'>
<p><span>2 tsps fish sauce</span></p>
</td>
</tr>
<tr style='height:27.9pt'>
<td width=150 style='width:149.5pt;border:solid windowtext 1.0pt;border-top:
none;padding:0in 5.4pt 0in 5.4pt;height:27.9pt'>
<p><span>1 tbsp water</span></p>
</td>
</tr>
<tr style='height:27.9pt'>
<td width=150 style='width:149.5pt;border:solid windowtext 1.0pt;border-top:
none;padding:0in 5.4pt 0in 5.4pt;height:27.9pt'>
<p><span>_ cup scallion chopped</span></p>
<p><span>(about 4 stalks)</span></p>
</td>
<td width=369 style='width:368.65pt;border-top:none;border-left:none;
border-bottom:solid windowtext 1.0pt;border-right:solid windowtext 1.0pt;
padding:0in 5.4pt 0in 5.4pt;height:27.9pt'>
<p><span>3. Stir scallions into egg
mixture then add to the heated olive oil.</span></p>
<p><span>4. Cover and reduce to medium
heat cooking for about 6 minutes or the egg slightly solidifies. Time is
reliant on size of pan.</span></p>
<p><span>5. Uncover and increase to
high heat and cook for about 2 more minutes or until the bottom is lightly
brown, then flip to brown the other side (about 2 minutes).</span></p>
<p><span>6. Remove from pan and cut
into bite size pieces prior to serving.</span></p>
</td>
</tr>
</table>
Pumpkin Cupcake With Pumpkin Pie Cream Cheese Frosting (high Altitude)2016-01-13T00:00:00+00:00http://fobesfamily.com/2016/01/13/pumpkin-cupcake-with-pumpkin-pie-cream-cheese-frosting-(high-altitude)<p><img src="https://fobesfamily.com/assets/images/2016/01/20151122-DSC_4903.jpg" alt="" /></p>
<p align=center style='text-align:center'><span>(Makes 12)</span></p>
<p><span> One
thing I really miss about moving from life at sea level to high altitude living
of over 7000 feet is the baking. None of my go to recipes that I love work the
way I want anymore. My baked goods would come out too dry or didn’t rise or
something would always be off with them. I have even tried Googling baking
recipes for high altitude bakers, but disappointingly, the recipes are usually
for around 5000 feet. Sure, some posts did say how to alter the recipe for
higher elevation but it did not turn out right. </span></p>
<p><img src="https://fobesfamily.com/assets/images/2016/01/20151122-DSC_4873.jpg" alt="" /></p>
<p style='text-indent:.5in'><span>Granted,
I knew what I was getting into but I really miss being able to toss something
quickly in the oven and know it will come out great. I’ve been testing and
modifying recipes for a while now and I’ve finally done it, I’ve finally been
able to compose a recipe for high altitude baking at 7000 feet! The cupcake rose
properly and it was moist and fluffy. I’m so excited to make these for the
holiday season. The combination of pumpkin, cinnamon and nutmeg is just
irresistible.</span></p>
<p><img src="https://fobesfamily.com/assets/images/2016/01/20151122-DSC_4884.jpg" alt="" /></p>
<p style='text-indent:.5in'><span>As
I was saying, this recipe has been tailored specifically for high altitude
baking. So for those of you lucky enough to be at sea level, you’ll have to
modify this recipe to make it work right for you. The big thing would be to
increase the leavening agents to help your cupcake rise as air pressure at sea
level is greater than those of us living at high altitude. But for those of us
living up here, above 5000 feet, I’m ecstatic to be able to provide a baking
post! I’ve personally been pulling my hair out trying to find suitable recipes
(I’m telling you it’s slim pickings!) and modifying the ones I have to get a
proper baked good.</span></p>
<p><img src="https://fobesfamily.com/assets/images/2016/01/20151122-DSC_4887.jpg" alt="" /></p>
<p><span> Now
that I have gotten a cupcake recipe to work, of course it is time to work on a
perfect frosting to go with it. Not to mention pretty decorations just to make
it that much better. Let’s just say my decorating supply have increased a bit
and I have been itching to put it to use. So below I have for you a Pumpkin Pie
Cream Cheese Frosting to pair with this Pumpkin Cupcake. Granted, you can
always use your choice of frosting but I really find that this frosting piled
high on top of my cupcake works seamlessly. The sweetness and creaminess of the
frosting combined with the pumpkin cupcake is amazing! </span></p>
<p><img src="https://fobesfamily.com/assets/images/2016/01/20151122-DSC_4896.jpg" alt="" /></p>
<table class=MsoTableGrid border=1 cellspacing=0 cellpadding=0 width=524
style='width:524.4pt;border-collapse:collapse;border:none'>
<tr style='height:21.5pt'>
<td width=239 style='width:239.4pt;border:solid windowtext 1.0pt;padding:
0in 5.4pt 0in 5.4pt;height:21.5pt'>
<p><span>1 cup all-purpose flour</span></p>
</td>
<td width=285 rowspan=6 style='width:285.0pt;border:solid windowtext 1.0pt;
border-left:none;padding:0in 5.4pt 0in 5.4pt;height:21.5pt'>
<p><span>1. Sift everything
together and set aside.</span></p>
</td>
</tr>
<tr style='height:21.1pt'>
<td width=239 style='width:239.4pt;border:solid windowtext 1.0pt;border-top:
none;padding:0in 5.4pt 0in 5.4pt;height:21.1pt'>
<p><span>1/4 tsp baking soda</span></p>
</td>
</tr>
<tr style='height:21.1pt'>
<td width=239 style='width:239.4pt;border:solid windowtext 1.0pt;border-top:
none;padding:0in 5.4pt 0in 5.4pt;height:21.1pt'>
<p><span>1/2 tsp baking powder</span></p>
</td>
</tr>
<tr style='height:21.1pt'>
<td width=239 style='width:239.4pt;border:solid windowtext 1.0pt;border-top:
none;padding:0in 5.4pt 0in 5.4pt;height:21.1pt'>
<p><span>1/4 tsp salt</span></p>
</td>
</tr>
<tr style='height:21.1pt'>
<td width=239 style='width:239.4pt;border:solid windowtext 1.0pt;border-top:
none;padding:0in 5.4pt 0in 5.4pt;height:21.1pt'>
<p><span>1 1/4 tsp cinnamon, ground</span></p>
</td>
</tr>
<tr style='height:21.1pt'>
<td width=239 style='width:239.4pt;border:solid windowtext 1.0pt;border-top:
none;padding:0in 5.4pt 0in 5.4pt;height:21.1pt'>
<p><span>1/4 tsp nutmeg, ground</span></p>
</td>
</tr>
<tr style='height:21.1pt'>
<td width=239 style='width:239.4pt;border:solid windowtext 1.0pt;border-top:
none;padding:0in 5.4pt 0in 5.4pt;height:21.1pt'>
<p><span>4 tbsps butter, unsalted,
room temperature</span></p>
</td>
<td width=285 style='width:285.0pt;border-top:none;border-left:none;
border-bottom:solid windowtext 1.0pt;border-right:solid windowtext 1.0pt;
padding:0in 5.4pt 0in 5.4pt;height:21.1pt'>
<p><span>2. Cream butter.</span></p>
</td>
</tr>
<tr style='height:21.1pt'>
<td width=239 style='width:239.4pt;border:solid windowtext 1.0pt;border-top:
none;padding:0in 5.4pt 0in 5.4pt;height:21.1pt'>
<p><span>1/4 cup sugar</span></p>
</td>
<td width=285 rowspan=2 style='width:285.0pt;border-top:none;border-left:
none;border-bottom:solid windowtext 1.0pt;border-right:solid windowtext 1.0pt;
padding:0in 5.4pt 0in 5.4pt;height:21.1pt'>
<p><span>3. Add sugar and beat until
fluffy.</span></p>
</td>
</tr>
<tr style='height:21.1pt'>
<td width=239 style='width:239.4pt;border:solid windowtext 1.0pt;border-top:
none;padding:0in 5.4pt 0in 5.4pt;height:21.1pt'>
<p><span>1/4 cup brown sugar,
packed</span></p>
</td>
</tr>
<tr style='height:21.1pt'>
<td width=239 style='width:239.4pt;border:solid windowtext 1.0pt;border-top:
none;padding:0in 5.4pt 0in 5.4pt;height:21.1pt'>
<p><span>2 eggs</span></p>
</td>
<td width=285 style='width:285.0pt;border-top:none;border-left:none;
border-bottom:solid windowtext 1.0pt;border-right:solid windowtext 1.0pt;
padding:0in 5.4pt 0in 5.4pt;height:21.1pt'>
<p><span>4. Incorporate the eggs
one at a time.</span></p>
</td>
</tr>
<tr style='height:21.1pt'>
<td width=239 style='width:239.4pt;border:solid windowtext 1.0pt;border-top:
none;padding:0in 5.4pt 0in 5.4pt;height:21.1pt'>
<p><span>1/4 cup milk, whole</span></p>
</td>
<td width=285 style='width:285.0pt;border-top:none;border-left:none;
border-bottom:solid windowtext 1.0pt;border-right:solid windowtext 1.0pt;
padding:0in 5.4pt 0in 5.4pt;height:21.1pt'>
<p><span>5. Alternate between the
dry ingredients and the milk, incorporate the ingredients into the butter
mix.</span></p>
<p><span>(NOTE: Start with the dry
ingredients.)</span></p>
</td>
</tr>
<tr style='height:21.1pt'>
<td width=239 style='width:239.4pt;border:solid windowtext 1.0pt;border-top:
none;padding:0in 5.4pt 0in 5.4pt;height:21.1pt'>
<p><span>1/4 cup pumpkin puree</span></p>
</td>
<td width=285 style='width:285.0pt;border-top:none;border-left:none;
border-bottom:solid windowtext 1.0pt;border-right:solid windowtext 1.0pt;
padding:0in 5.4pt 0in 5.4pt;height:21.1pt'>
<p><span>6. Stir in the pumpkin
puree.</span></p>
<p><span>7. Line the cupcake pan
and fill each cup to almost half full.</span></p>
<p><span>8. Bake at 365F for 16
minutes or until your toothpick comes out clean.</span></p>
<p><span>9. Remove from oven and
let the cupcakes cool in the pan for 5 minutes.</span></p>
<p><span>6. Take the cupcakes out
of the pan and let cool completely on a flat surface before frosting.</span></p>
</td>
</tr>
</table>
<table class=MsoTableGrid border=1 cellspacing=0 cellpadding=0
style='border-collapse:collapse;border:none'>
<tr style='height:27.1pt'>
<td width=533 colspan=2 style='width:533.2pt;border:solid windowtext 1.0pt;
padding:0in 5.4pt 0in 5.4pt;height:27.1pt'>
<p align=center style='text-align:center'><span
>Pumpkin Pie Cream Cheese Frosting (frosts 12
cupcakes generously)</span></p>
</td>
</tr>
<tr style='height:18.1pt'>
<td width=181 style='width:180.9pt;border:solid windowtext 1.0pt;border-top:
none;padding:0in 5.4pt 0in 5.4pt;height:18.1pt'>
<p><span>8 oz cream cheese</span></p>
</td>
<td width=352 rowspan=2 style='width:352.3pt;border-top:none;border-left:
none;border-bottom:solid windowtext 1.0pt;border-right:solid windowtext 1.0pt;
padding:0in 5.4pt 0in 5.4pt;height:18.1pt'>
<p><span>1. Cream together.</span></p>
</td>
</tr>
<tr style='height:17.95pt'>
<td width=181 style='width:180.9pt;border:solid windowtext 1.0pt;border-top:
none;padding:0in 5.4pt 0in 5.4pt;height:17.95pt'>
<p><span>4 tbsps butter, unsalted</span></p>
</td>
</tr>
<tr style='height:17.95pt'>
<td width=181 style='width:180.9pt;border:solid windowtext 1.0pt;border-top:
none;padding:0in 5.4pt 0in 5.4pt;height:17.95pt'>
<p><span>1 1/2 tsp cinnamon, ground</span></p>
</td>
<td width=352 rowspan=5 style='width:352.3pt;border-top:none;border-left:
none;border-bottom:solid windowtext 1.0pt;border-right:solid windowtext 1.0pt;
padding:0in 5.4pt 0in 5.4pt;height:17.95pt'>
<p><span>2. Mix all the dry
ingredients until well incorporated into the puree.</span></p>
<p><span>3. Add to the creamed
butter mix and combine well.</span></p>
</td>
</tr>
<tr style='height:17.95pt'>
<td width=181 style='width:180.9pt;border:solid windowtext 1.0pt;border-top:
none;padding:0in 5.4pt 0in 5.4pt;height:17.95pt'>
<p><span>1/4 tsp nutmeg, ground</span></p>
</td>
</tr>
<tr style='height:17.95pt'>
<td width=181 style='width:180.9pt;border:solid windowtext 1.0pt;border-top:
none;padding:0in 5.4pt 0in 5.4pt;height:17.95pt'>
<p><span>1/8 tsp clove, ground</span></p>
</td>
</tr>
<tr style='height:17.95pt'>
<td width=181 style='width:180.9pt;border:solid windowtext 1.0pt;border-top:
none;padding:0in 5.4pt 0in 5.4pt;height:17.95pt'>
<p><span>1/4 tsp ginger, ground</span></p>
</td>
</tr>
<tr style='height:17.95pt'>
<td width=181 style='width:180.9pt;border:solid windowtext 1.0pt;border-top:
none;padding:0in 5.4pt 0in 5.4pt;height:17.95pt'>
<p><span>3-4 tbsps pumpkin puree</span></p>
</td>
</tr>
<tr style='height:17.95pt'>
<td width=181 style='width:180.9pt;border:solid windowtext 1.0pt;border-top:
none;padding:0in 5.4pt 0in 5.4pt;height:17.95pt'>
<p><span>3 1/2 cups powder sugar</span></p>
</td>
<td width=352 style='width:352.3pt;border-top:none;border-left:none;
border-bottom:solid windowtext 1.0pt;border-right:solid windowtext 1.0pt;
padding:0in 5.4pt 0in 5.4pt;height:17.95pt'>
<p><span>4. Slowly mix in the
powdered sugar until you reached your desired consistency.</span></p>
<p><span> </span></p>
<p><span>(NOTE: IF you’re
interested, I used gel food coloring to achieve my desired colors to decorate
the cupcakes.)</span></p>
</td>
</tr>
</table>
Hot Chocolate2015-12-23T00:00:00+00:00http://fobesfamily.com/2015/12/23/hot-chocolate<p><img src="https://fobesfamily.com/assets/images/2015/12/20151111-DSC_4779.jpg" alt="" /></p>
<p align=center style='text-align:center'><span>(Makes about 3 1/2 Cups)</span></p>
<p style='text-indent:.5in'><span>Christmas
just doesn’t feel like Christmas without some marshmallows and hot chocolate. I
love sitting next to an open fire while sipping some hot chocolate as the snow
blankets everything white outside. Instant hot chocolate just doesn’t make the
cut. It doesn’t give you that same creamy richness and leaves powdery feel. As
for homemade recipes, I find them either too chocolaty or overly sweet. And to
top it off, the recipes makes enough for an army! So I decided to make my own
version.</span></p>
<p><img src="https://fobesfamily.com/assets/images/2015/12/20151111-DSC_4763.jpg" alt="" /></p>
<p style='text-indent:.5in'><span>It
took me a few tries to come up with the perfect balance of chocolate and milk
but the effort was worth it. With all the snow days that we’ve been getting
here, I’ve been making this a lot. And of course, my little two-year-old enjoys
snacking on the mini-marshmallows while helping stir the hot chocolate. With
such a simple recipe, there is no reason to not enjoy this more often right?</span></p>
<p><img src="https://fobesfamily.com/assets/images/2015/12/20151111-DSC_4769.jpg" alt="" />
<img src="https://fobesfamily.com/assets/images/2015/12/20151111-DSC_4772.jpg" alt="" /></p>
<table border=1 cellspacing=0 cellpadding=0 width=552
style='width:551.75pt;border-collapse:collapse;border:none'>
<tr style='height:34.65pt'>
<td width=231 style='width:231.25pt;border:solid windowtext 1.0pt;padding:
0in 5.4pt 0in 5.4pt;height:34.65pt'>
<p><span>1/3 cup semi-sweet
chocolate morsel</span></p>
</td>
<td width=321 style='width:320.5pt;border:solid windowtext 1.0pt;border-left:
none;padding:0in 5.4pt 0in 5.4pt;height:34.65pt'>
<p><span>1. Melt the chocolate in a
double broiler on medium low heat.</span></p>
</td>
</tr>
<tr style='height:34.45pt'>
<td width=231 style='width:231.25pt;border:solid windowtext 1.0pt;border-top:
none;padding:0in 5.4pt 0in 5.4pt;height:34.45pt'>
<p><span>1 tbsp sugar</span></p>
</td>
<td width=321 style='width:320.5pt;border-top:none;border-left:none;
border-bottom:solid windowtext 1.0pt;border-right:solid windowtext 1.0pt;
padding:0in 5.4pt 0in 5.4pt;height:34.45pt'>
<p><span>2. Stir in the sugar until
dissolved.</span></p>
</td>
</tr>
<tr style='height:34.45pt'>
<td width=231 style='width:231.25pt;border:solid windowtext 1.0pt;border-top:
none;padding:0in 5.4pt 0in 5.4pt;height:34.45pt'>
<p><span>2 cup milk</span></p>
</td>
<td width=321 rowspan=2 style='width:320.5pt;border-top:none;border-left:
none;border-bottom:solid windowtext 1.0pt;border-right:solid windowtext 1.0pt;
padding:0in 5.4pt 0in 5.4pt;height:34.45pt'>
<p><span>3. Combine the milk and
cream and slowly incorporate into the chocolate.</span></p>
</td>
</tr>
<tr style='height:34.45pt'>
<td width=231 style='width:231.25pt;border:solid windowtext 1.0pt;border-top:
none;padding:0in 5.4pt 0in 5.4pt;height:34.45pt'>
<p><span>1 cup heavy cream</span></p>
</td>
</tr>
<tr style='height:34.45pt'>
<td width=231 style='width:231.25pt;border:solid windowtext 1.0pt;border-top:
none;padding:0in 5.4pt 0in 5.4pt;height:34.45pt'>
<p><span>1/2 tsp vanilla extract</span></p>
</td>
<td width=321 style='width:320.5pt;border-top:none;border-left:none;
border-bottom:solid windowtext 1.0pt;border-right:solid windowtext 1.0pt;
padding:0in 5.4pt 0in 5.4pt;height:34.45pt'>
<p><span>4. Once the milk and cream
is heated through, turn off the heat and mix in the vanilla extract.</span></p>
</td>
</tr>
<tr style='height:34.45pt'>
<td width=231 style='width:231.25pt;border:solid windowtext 1.0pt;border-top:
none;padding:0in 5.4pt 0in 5.4pt;height:34.45pt'>
<p><span>Marshmallows (optional)</span></p>
</td>
<td width=321 style='width:320.5pt;border-top:none;border-left:none;
border-bottom:solid windowtext 1.0pt;border-right:solid windowtext 1.0pt;
padding:0in 5.4pt 0in 5.4pt;height:34.45pt'>
<p><span>5. Pour into mugs, top
with marshmallows and enjoy.</span></p>
</td>
</tr>
</table>
Crispy Oven Baked Okra2015-12-23T00:00:00+00:00http://fobesfamily.com/2015/12/23/crispy-oven-baked-okra<p><img src="https://fobesfamily.com/assets/images/2015/12/20151114-DSC_4856.jpg" alt="" /></p>
<p align=center style='text-align:center'><span>(Servings 4)</span></p>
<p><span> I’ve
never been a fan of okra until I lived in New Orleans and had myself some
gumbo. Since then I have learned to enjoy this green seed pod. It has this
natural slimy texture that many do not like, but if cooked properly it will not
be an issue. Recently, I posted a recipe for Garlicky Bang Bang Shrimp Pasta
where okra would be a great vegetable side-dish. This super simple dish is a
breeze to whip-up. There is virtually no prep work!!! Sometimes something
simple can be so amazing.</span></p>
<p><img src="https://fobesfamily.com/assets/images/2015/12/20151114-DSC_4852.jpg" alt="" /></p>
<p style='text-indent:.5in'><span>A
perfect beginner’s dish that will sure to wow your palate. All you have to do
is purchase some frozen pre-cut okra, let it slightly defrost, toss in the
seasoning and let the oven to the rest! This is probably one of the simplest
recipe that I have in my repertoire but so delicious. The oven will crisp up
the okra, leaving none of that slimy texture that I know many do not prefer.
The seasoning is subtle, but still gives you a tiny kick with every
bite. </span></p>
<p><img src="https://fobesfamily.com/assets/images/2015/12/20151114-DSC_4862.jpg" alt="" /></p>
<table border=1 cellspacing=0 cellpadding=0 width=551
style='width:551.25pt;border-collapse:collapse;border:none'>
<tr style='height:28.6pt'>
<td width=266 style='width:3.7in;border:solid windowtext 1.0pt;padding:0in 5.4pt 0in 5.4pt;
height:28.6pt'>
<p><span>18 oz okra, frozen and cut
and slightly defrosted</span></p>
</td>
<td width=285 rowspan=5 style='width:284.85pt;border:solid windowtext 1.0pt;
border-left:none;padding:0in 5.4pt 0in 5.4pt;height:28.6pt'>
<p><span>1. Toss the okra with the
seasoning and oil in a baking dish.</span></p>
<p><span>2. Bake at 400F for about
50 minutes until crispy.</span></p>
<p><span>3. Stir the okra ever 20
minutes while cooking.</span></p>
<p><span>4. Serve hot.</span></p>
</td>
</tr>
<tr style='height:29.3pt'>
<td width=266 style='width:3.7in;border:solid windowtext 1.0pt;border-top:
none;padding:0in 5.4pt 0in 5.4pt;height:29.3pt'>
<p><span>1 1/2 tsp salt</span></p>
</td>
</tr>
<tr style='height:28.5pt'>
<td width=266 style='width:3.7in;border:solid windowtext 1.0pt;border-top:
none;padding:0in 5.4pt 0in 5.4pt;height:28.5pt'>
<p><span>1/2 tsp black pepper</span></p>
</td>
</tr>
<tr style='height:28.5pt'>
<td width=266 style='width:3.7in;border:solid windowtext 1.0pt;border-top:
none;padding:0in 5.4pt 0in 5.4pt;height:28.5pt'>
<p><span>3/4 tsp paprika</span></p>
</td>
</tr>
<tr style='height:28.5pt'>
<td width=266 style='width:3.7in;border:solid windowtext 1.0pt;border-top:
none;padding:0in 5.4pt 0in 5.4pt;height:28.5pt'>
<p><span>2 tbsps olive oil</span></p>
</td>
</tr>
</table>
Vietnamese Pork Patties2015-12-11T00:00:00+00:00http://fobesfamily.com/2015/12/11/vietnamese-pork-patties<p><img src="https://fobesfamily.com/assets/images/2015/12/20150924-20150924-DSC_4342.jpg" alt="" /></p>
<p align=center style='text-align:center'><span>(Servings 4)</span></p>
<p style='text-indent:.5in'><span>After
moving here, finding a decent batch of ground pork or getting it ground by the
butcher have been next to impossible. So what does my husband do but get me a
meat grinder attachment for my KitchenAid. What can I say, we love getting new
toys for the kitchen. On the one hand, it is extra work to have to grind your
own meat but you do get to create your own blend. Of course I needed to try out
my grinder which lead to lots of ground pork dishes I’m sure will soon appear
on the blog.</span></p>
<p><img src="https://fobesfamily.com/assets/images/2015/12/20150923-20150923-DSC_4305.jpg" alt="" /></p>
<p style='text-indent:.5in'><span>For
today I decided to make Vietnamese Pork Patties as it has been awhile since I
had a go at this dish. I got my husband hooked on this after I first introduced
it to him. Like a lot of Vietnamese meals, the pork patties itself does not
take that long to prepare. It is the preparation of all the sides to compose a
complete meal that is time consuming. You’ll need to prepare vermicelli,
scallion oil, sort the vegetables and make the dipping sauce to accompany the
pork patties. The freshness of the herbs truly lightens the heartiness of the meat.
The vermicelli acts as a blank canvas to carry the intricate flavors of the
dipping sauce. This meal is a prime example of the five fundamental tastes that
Vietnamese people use as a gauge for a great meal: sour, bitter, sweet, spicy
and salty. A cohesive meal should not only include all these tastes but also
balances it as well.</span></p>
<p><img src="https://fobesfamily.com/assets/images/2015/12/20150924-20150924-DSC_4311.jpg" alt="" /></p>
<p style='text-indent:.5in'><span>This
is a great summer dish. All the fresh herbs and vegetables really helps fight
the heat. Not to mention how healthy it is for you. I like to compose my bowl
in specific layers. First, some vermicelli, then a few handfuls of a variety of
herbs and vegetables, followed by a couple of pork patties, which is finally
topped with dipping sauce. You have the major food groups in one bowl: protein,
vegetable and carbohydrates. And it tastes amazing!</span></p>
<p><img src="https://fobesfamily.com/assets/images/2015/12/20150924-20150924-DSC_4331.jpg" alt="" />
<img src="https://fobesfamily.com/assets/images/2015/12/20150924-20150924-DSC_4313.jpg" alt="" /></p>
<p style='text-indent:.5in'><span>I
know this recipe is a little more involved but the results are well worth the
effort. This is great for large gatherings or small. Personally, I purposefully
make a little extra for a couple of lunches-worth during the week. However,
there is nothing wrong with having it all in one go. Enjoy this dish and I will
see you next week; hopefully with a recipe that will interest you. </span></p>
<p><img src="https://fobesfamily.com/assets/images/2015/12/20150924-20150924-DSC_4339.jpg" alt="" />
<img src="https://fobesfamily.com/assets/images/2015/12/20150924-20150924-DSC_4326.jpg" alt="" /></p>
<table class=MsoTableGrid border=1 cellspacing=0 cellpadding=0 width=542
style='width:541.9pt;border-collapse:collapse;border:none'>
<tr style='height:20.05pt'>
<td width=194 style='width:2.7in;border:solid windowtext 1.0pt;padding:0in 5.4pt 0in 5.4pt;
height:20.05pt'>
<p><span>2 lbs pork, ground</span></p>
</td>
<td width=348 rowspan=8 style='width:347.5pt;border:solid windowtext 1.0pt;
border-left:none;padding:0in 5.4pt 0in 5.4pt;height:20.05pt'>
<p><span>1. Mix all ingredients
together until well incorporated.</span></p>
<p><span>2. Form about 1/4 cup of
the meat mixture into a ball and flatten into patties (like a slider) for
even cooking.</span></p>
</td>
</tr>
<tr style='height:20.05pt'>
<td width=194 style='width:2.7in;border:solid windowtext 1.0pt;border-top:
none;padding:0in 5.4pt 0in 5.4pt;height:20.05pt'>
<p><span>2 tbsps garlic, minced</span></p>
</td>
</tr>
<tr style='height:20.05pt'>
<td width=194 style='width:2.7in;border:solid windowtext 1.0pt;border-top:
none;padding:0in 5.4pt 0in 5.4pt;height:20.05pt'>
<p><span>1/3 cup scallions, chopped
(white only)</span></p>
</td>
</tr>
<tr style='height:20.05pt'>
<td width=194 style='width:2.7in;border:solid windowtext 1.0pt;border-top:
none;padding:0in 5.4pt 0in 5.4pt;height:20.05pt'>
<p><span>1 tsp black pepper</span></p>
</td>
</tr>
<tr style='height:20.05pt'>
<td width=194 style='width:2.7in;border:solid windowtext 1.0pt;border-top:
none;padding:0in 5.4pt 0in 5.4pt;height:20.05pt'>
<p><span>1/2 tsp salt</span></p>
</td>
</tr>
<tr style='height:20.05pt'>
<td width=194 style='width:2.7in;border:solid windowtext 1.0pt;border-top:
none;padding:0in 5.4pt 0in 5.4pt;height:20.05pt'>
<p><span>1 tsp sugar</span></p>
</td>
</tr>
<tr style='height:20.05pt'>
<td width=194 style='width:2.7in;border:solid windowtext 1.0pt;border-top:
none;padding:0in 5.4pt 0in 5.4pt;height:20.05pt'>
<p><span>1/2 tsp msg (optional)</span></p>
</td>
</tr>
<tr style='height:20.05pt'>
<td width=194 style='width:2.7in;border:solid windowtext 1.0pt;border-top:
none;padding:0in 5.4pt 0in 5.4pt;height:20.05pt'>
<p><span>4 tsps fish sauce</span></p>
</td>
</tr>
<tr style='height:20.05pt'>
<td width=194 style='width:2.7in;border:solid windowtext 1.0pt;border-top:
none;padding:0in 5.4pt 0in 5.4pt;height:20.05pt'>
<p><span>2 tbsps oil</span></p>
</td>
<td width=348 style='width:347.5pt;border-top:none;border-left:none;
border-bottom:solid windowtext 1.0pt;border-right:solid windowtext 1.0pt;
padding:0in 5.4pt 0in 5.4pt;height:20.05pt'>
<p><span>3. On medium heat in a
frying pan, heat the oil.</span></p>
<p><span>4. Carefully place the
pork patties on the pan and cook each side for about 7 minutes until golden
brown.</span></p>
<p><span>5. Plate patties once done.</span></p>
<p><span> </span></p>
<p><span>(NOTE: Cooking time is
dependent on the thickness of the patties.)</span></p>
</td>
</tr>
<tr style='height:20.05pt'>
<td width=194 style='width:2.7in;border:solid windowtext 1.0pt;border-top:
none;padding:0in 5.4pt 0in 5.4pt;height:20.05pt'>
<p><span>1/2 cup scallions, chopped</span></p>
</td>
<td width=348 rowspan=2 style='width:347.5pt;border-top:none;border-left:
none;border-bottom:solid windowtext 1.0pt;border-right:solid windowtext 1.0pt;
padding:0in 5.4pt 0in 5.4pt;height:20.05pt'>
<p><span>6. Combine the scallions
and oil in a heat resistant bowl.</span></p>
<p><span>7. Heat in microwave for
about 45 seconds to slightly cook the scallions.</span></p>
<p><span>8. Remove from microwave
and pour over the pork patties.</span></p>
<p><span>9. Serve immediately with
vermicelli, vegetables and dipping sauce.</span></p>
</td>
</tr>
<tr style='height:20.05pt'>
<td width=194 style='width:2.7in;border:solid windowtext 1.0pt;border-top:
none;padding:0in 5.4pt 0in 5.4pt;height:20.05pt'>
<p><span>1/3 cup olive oil</span></p>
</td>
</tr>
</table>
<p><span> </span></p>
<table class=MsoTableGrid border=1 cellspacing=0 cellpadding=0
style='border-collapse:collapse;border:none'>
<tr style='height:26.2pt'>
<td width=533 colspan=2 style='width:532.9pt;border:solid windowtext 1.0pt;
padding:0in 5.4pt 0in 5.4pt;height:26.2pt'>
<p align=center style='text-align:center'><span
>Typical Vegetables and Herbs to Serve with the
Vietnamese Pork Patties</span></p>
</td>
</tr>
<tr style='height:26.15pt'>
<td width=266 style='width:266.45pt;border:solid windowtext 1.0pt;border-top:
none;padding:0in 5.4pt 0in 5.4pt;height:26.15pt'>
<p><span>Cucumbers</span></p>
</td>
<td width=266 style='width:266.45pt;border-top:none;border-left:none;
border-bottom:solid windowtext 1.0pt;border-right:solid windowtext 1.0pt;
padding:0in 5.4pt 0in 5.4pt;height:26.15pt'>
<p><span>Cilantro</span></p>
</td>
</tr>
<tr style='height:26.15pt'>
<td width=266 style='width:266.45pt;border:solid windowtext 1.0pt;border-top:
none;padding:0in 5.4pt 0in 5.4pt;height:26.15pt'>
<p><span>Lettuce</span></p>
</td>
<td width=266 style='width:266.45pt;border-top:none;border-left:none;
border-bottom:solid windowtext 1.0pt;border-right:solid windowtext 1.0pt;
padding:0in 5.4pt 0in 5.4pt;height:26.15pt'>
<p><span>Perilla Leaves</span></p>
</td>
</tr>
<tr style='height:26.15pt'>
<td width=266 style='width:266.45pt;border:solid windowtext 1.0pt;border-top:
none;padding:0in 5.4pt 0in 5.4pt;height:26.15pt'>
<p><span>Mint</span></p>
</td>
<td width=266 style='width:266.45pt;border-top:none;border-left:none;
border-bottom:solid windowtext 1.0pt;border-right:solid windowtext 1.0pt;
padding:0in 5.4pt 0in 5.4pt;height:26.15pt'>
<p><span>Vietnamese coriander</span></p>
</td>
</tr>
<tr style='height:26.15pt'>
<td width=266 style='width:266.45pt;border:solid windowtext 1.0pt;border-top:
none;padding:0in 5.4pt 0in 5.4pt;height:26.15pt'>
<p><span>Thai Basil</span></p>
</td>
<td width=266 style='width:266.45pt;border-top:none;border-left:none;
border-bottom:solid windowtext 1.0pt;border-right:solid windowtext 1.0pt;
padding:0in 5.4pt 0in 5.4pt;height:26.15pt'>
<p><span>Vietnamese balm</span></p>
</td>
</tr>
</table>
<p><img src="https://fobesfamily.com/assets/images/2015/10/20150802-20150802-DSC_4077.jpg" alt="" /></p>
<table class=MsoTableGrid border=1 cellspacing=0 cellpadding=0
style='border-collapse:collapse;border:none'>
<tr style='height:43.55pt'>
<td width=516 colspan=2 style='width:515.6pt;border:solid windowtext 1.0pt;
padding:0in 5.4pt 0in 5.4pt;height:43.55pt'>
<p align=center style='text-align:center'><span
>Dipping Sauce (makes 3 cups)</span></p>
</td>
</tr>
<tr style='height:25.8pt'>
<td width=188 style='width:187.9pt;border:solid windowtext 1.0pt;border-top:
none;padding:0in 5.4pt 0in 5.4pt;height:25.8pt'>
<p><span>1 cup simple syrup</span></p>
</td>
<td width=328 rowspan=3 style='width:327.7pt;border-top:none;border-left:
none;border-bottom:solid windowtext 1.0pt;border-right:solid windowtext 1.0pt;
padding:0in 5.4pt 0in 5.4pt;height:25.8pt'>
<p><span>1. Mix until dissolved.</span></p>
</td>
</tr>
<tr style='height:25.8pt'>
<td width=188 style='width:187.9pt;border:solid windowtext 1.0pt;border-top:
none;padding:0in 5.4pt 0in 5.4pt;height:25.8pt'>
<p><span>1/2 tsp salt</span></p>
</td>
</tr>
<tr style='height:25.8pt'>
<td width=188 style='width:187.9pt;border:solid windowtext 1.0pt;border-top:
none;padding:0in 5.4pt 0in 5.4pt;height:25.8pt'>
<p><span>1 tsp msg (optional)</span></p>
</td>
</tr>
<tr style='height:25.8pt'>
<td width=188 style='width:187.9pt;border:solid windowtext 1.0pt;border-top:
none;padding:0in 5.4pt 0in 5.4pt;height:25.8pt'>
<p><span>2 tbsps garlic, minced </span></p>
</td>
<td width=328 rowspan=6 style='width:327.7pt;border-top:none;border-left:
none;border-bottom:solid windowtext 1.0pt;border-right:solid windowtext 1.0pt;
padding:0in 5.4pt 0in 5.4pt;height:25.8pt'>
<p><span>2. Combine and adjust to
taste.</span></p>
<p><span>3. Refrigerate until
needed. </span></p>
<p><span> </span></p>
<p><span>(NOTE: This will keep for
a few weeks in the refrigerator.)</span></p>
</td>
</tr>
<tr style='height:25.8pt'>
<td width=188 style='width:187.9pt;border:solid windowtext 1.0pt;border-top:
none;padding:0in 5.4pt 0in 5.4pt;height:25.8pt'>
<p><span>1 tbsp thai chili, minced</span></p>
</td>
</tr>
<tr style='height:25.8pt'>
<td width=188 style='width:187.9pt;border:solid windowtext 1.0pt;border-top:
none;padding:0in 5.4pt 0in 5.4pt;height:25.8pt'>
<p><span>1/4 cup fresh lime juice</span></p>
</td>
</tr>
<tr style='height:25.8pt'>
<td width=188 style='width:187.9pt;border:solid windowtext 1.0pt;border-top:
none;padding:0in 5.4pt 0in 5.4pt;height:25.8pt'>
<p><span>11/2 cup water</span></p>
</td>
</tr>
<tr style='height:25.8pt'>
<td width=188 style='width:187.9pt;border:solid windowtext 1.0pt;border-top:
none;padding:0in 5.4pt 0in 5.4pt;height:25.8pt'>
<p><span>10 tbsps fish sauce</span></p>
</td>
</tr>
<tr style='height:25.8pt'>
<td width=188 style='width:187.9pt;border:solid windowtext 1.0pt;border-top:
none;padding:0in 5.4pt 0in 5.4pt;height:25.8pt'>
<p><span>1/4 cup vinegar</span></p>
</td>
</tr>
</table>
Caramelized Coconut Pork Belly And Eggs2015-12-11T00:00:00+00:00http://fobesfamily.com/2015/12/11/caramelized-coconut-pork-belly-and-eggs<p><img src="https://fobesfamily.com/assets/images/2015/12/20150924-20150924-DSC_4346.jpg" alt="" /></p>
<p align=center style='text-align:center'><span>(Servings 6)</span></p>
<p style='text-indent:.5in'><span> Happy Lunar New Year everyone! Well, it's officially on Monday; the year of the Monkey. Today
I have for you, Caramelized Coconut Pork Belly and Eggs. I have yet to meet anyone
who does not like this dish. But then again, what’s not to like? Let’s be real
here, you’re obviously not going to be eating this dish everyday if you plan on
being healthy but for those special occasions you just have to be a little more
decadent. This is a traditional dish served during Tet, Vietnamese Lunar New
Year. I don’t think it’s a coincidence that pickled items are also a Tet
tradition as Pickled Mustard Greens pairs so well with this dish. When I don’t
have any on hand, plain cucumber pieces will also do the trick. </span></p>
<p><img src="https://fobesfamily.com/assets/images/2015/12/20150924-20150924-DSC_4315.jpg" alt="" />
<img src="https://fobesfamily.com/assets/images/2015/12/20150924-20150924-DSC_4321.jpg" alt="" /></p>
<p style='text-indent:.5in'><span></span> I know,
pork belly and bacon is the rave right now. But I have been enjoying pork belly
way before it has become a fad. I am unsure about other cultures, but for
Vietnamese cuisine, pork is widely used and pork belly is a prized cut for so
many reasons. The perfect layers of meat and fat when cooked is
mouth-wateringly soft with flavors words can not express.
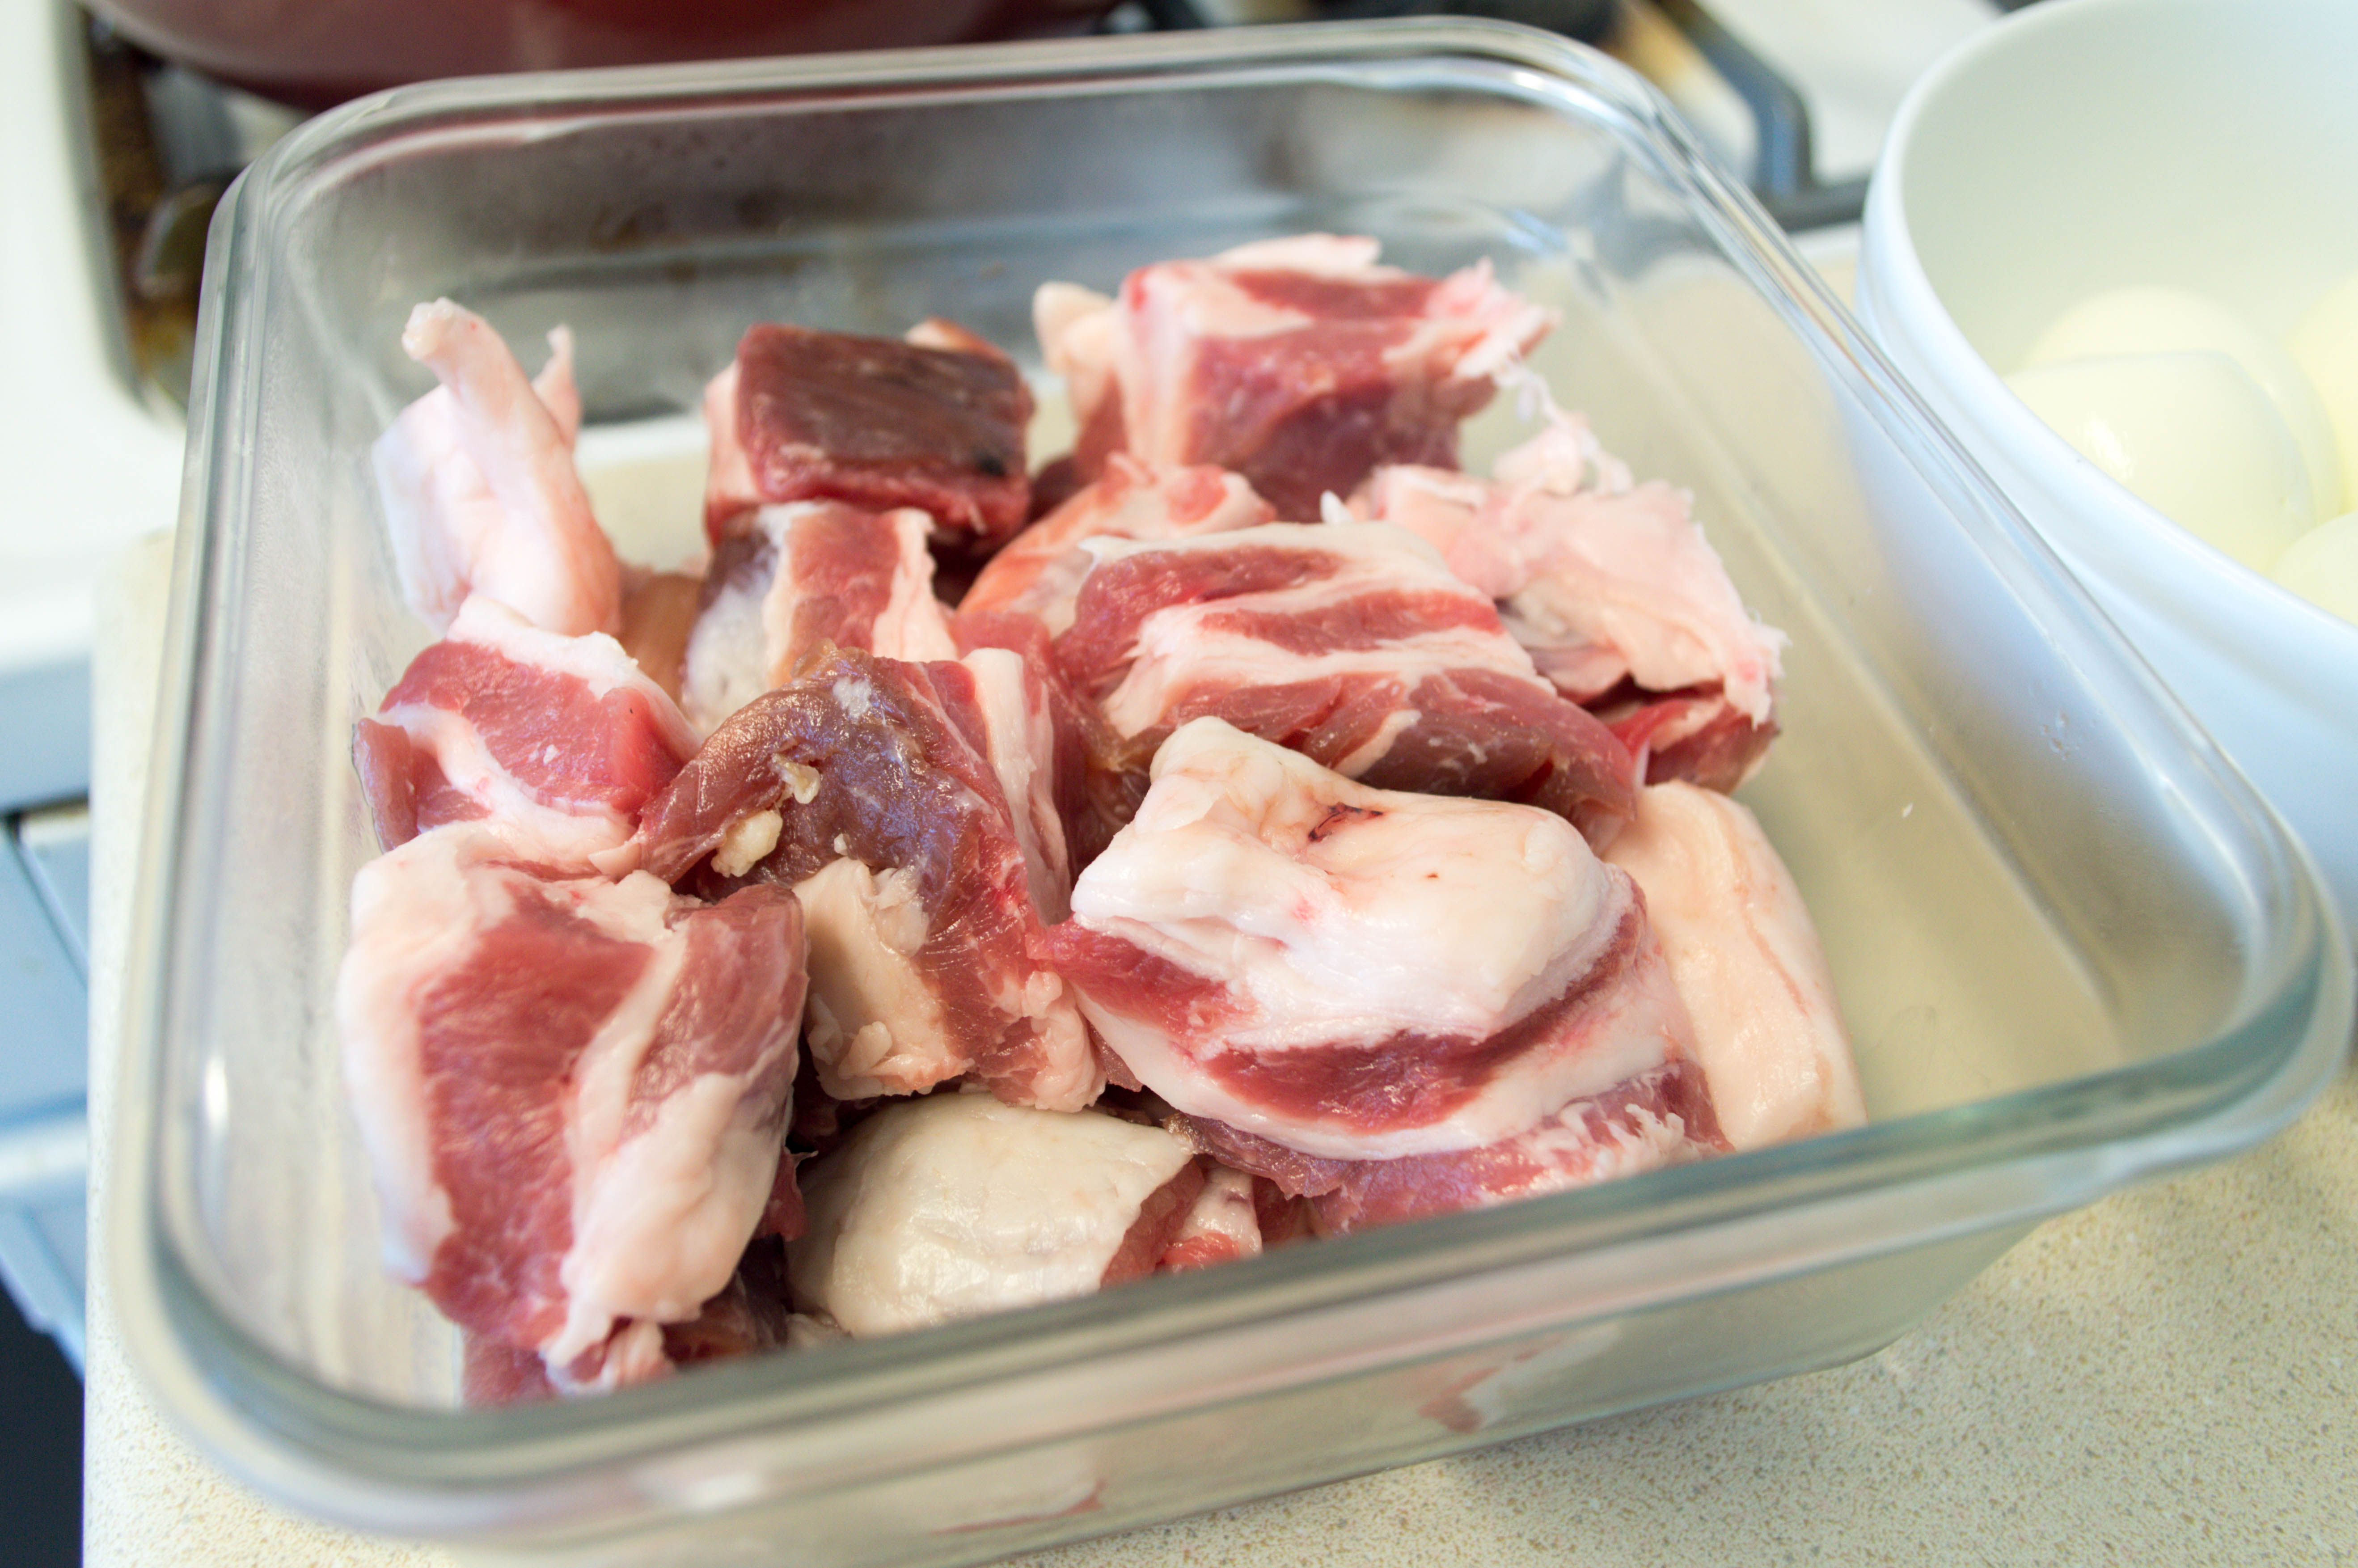
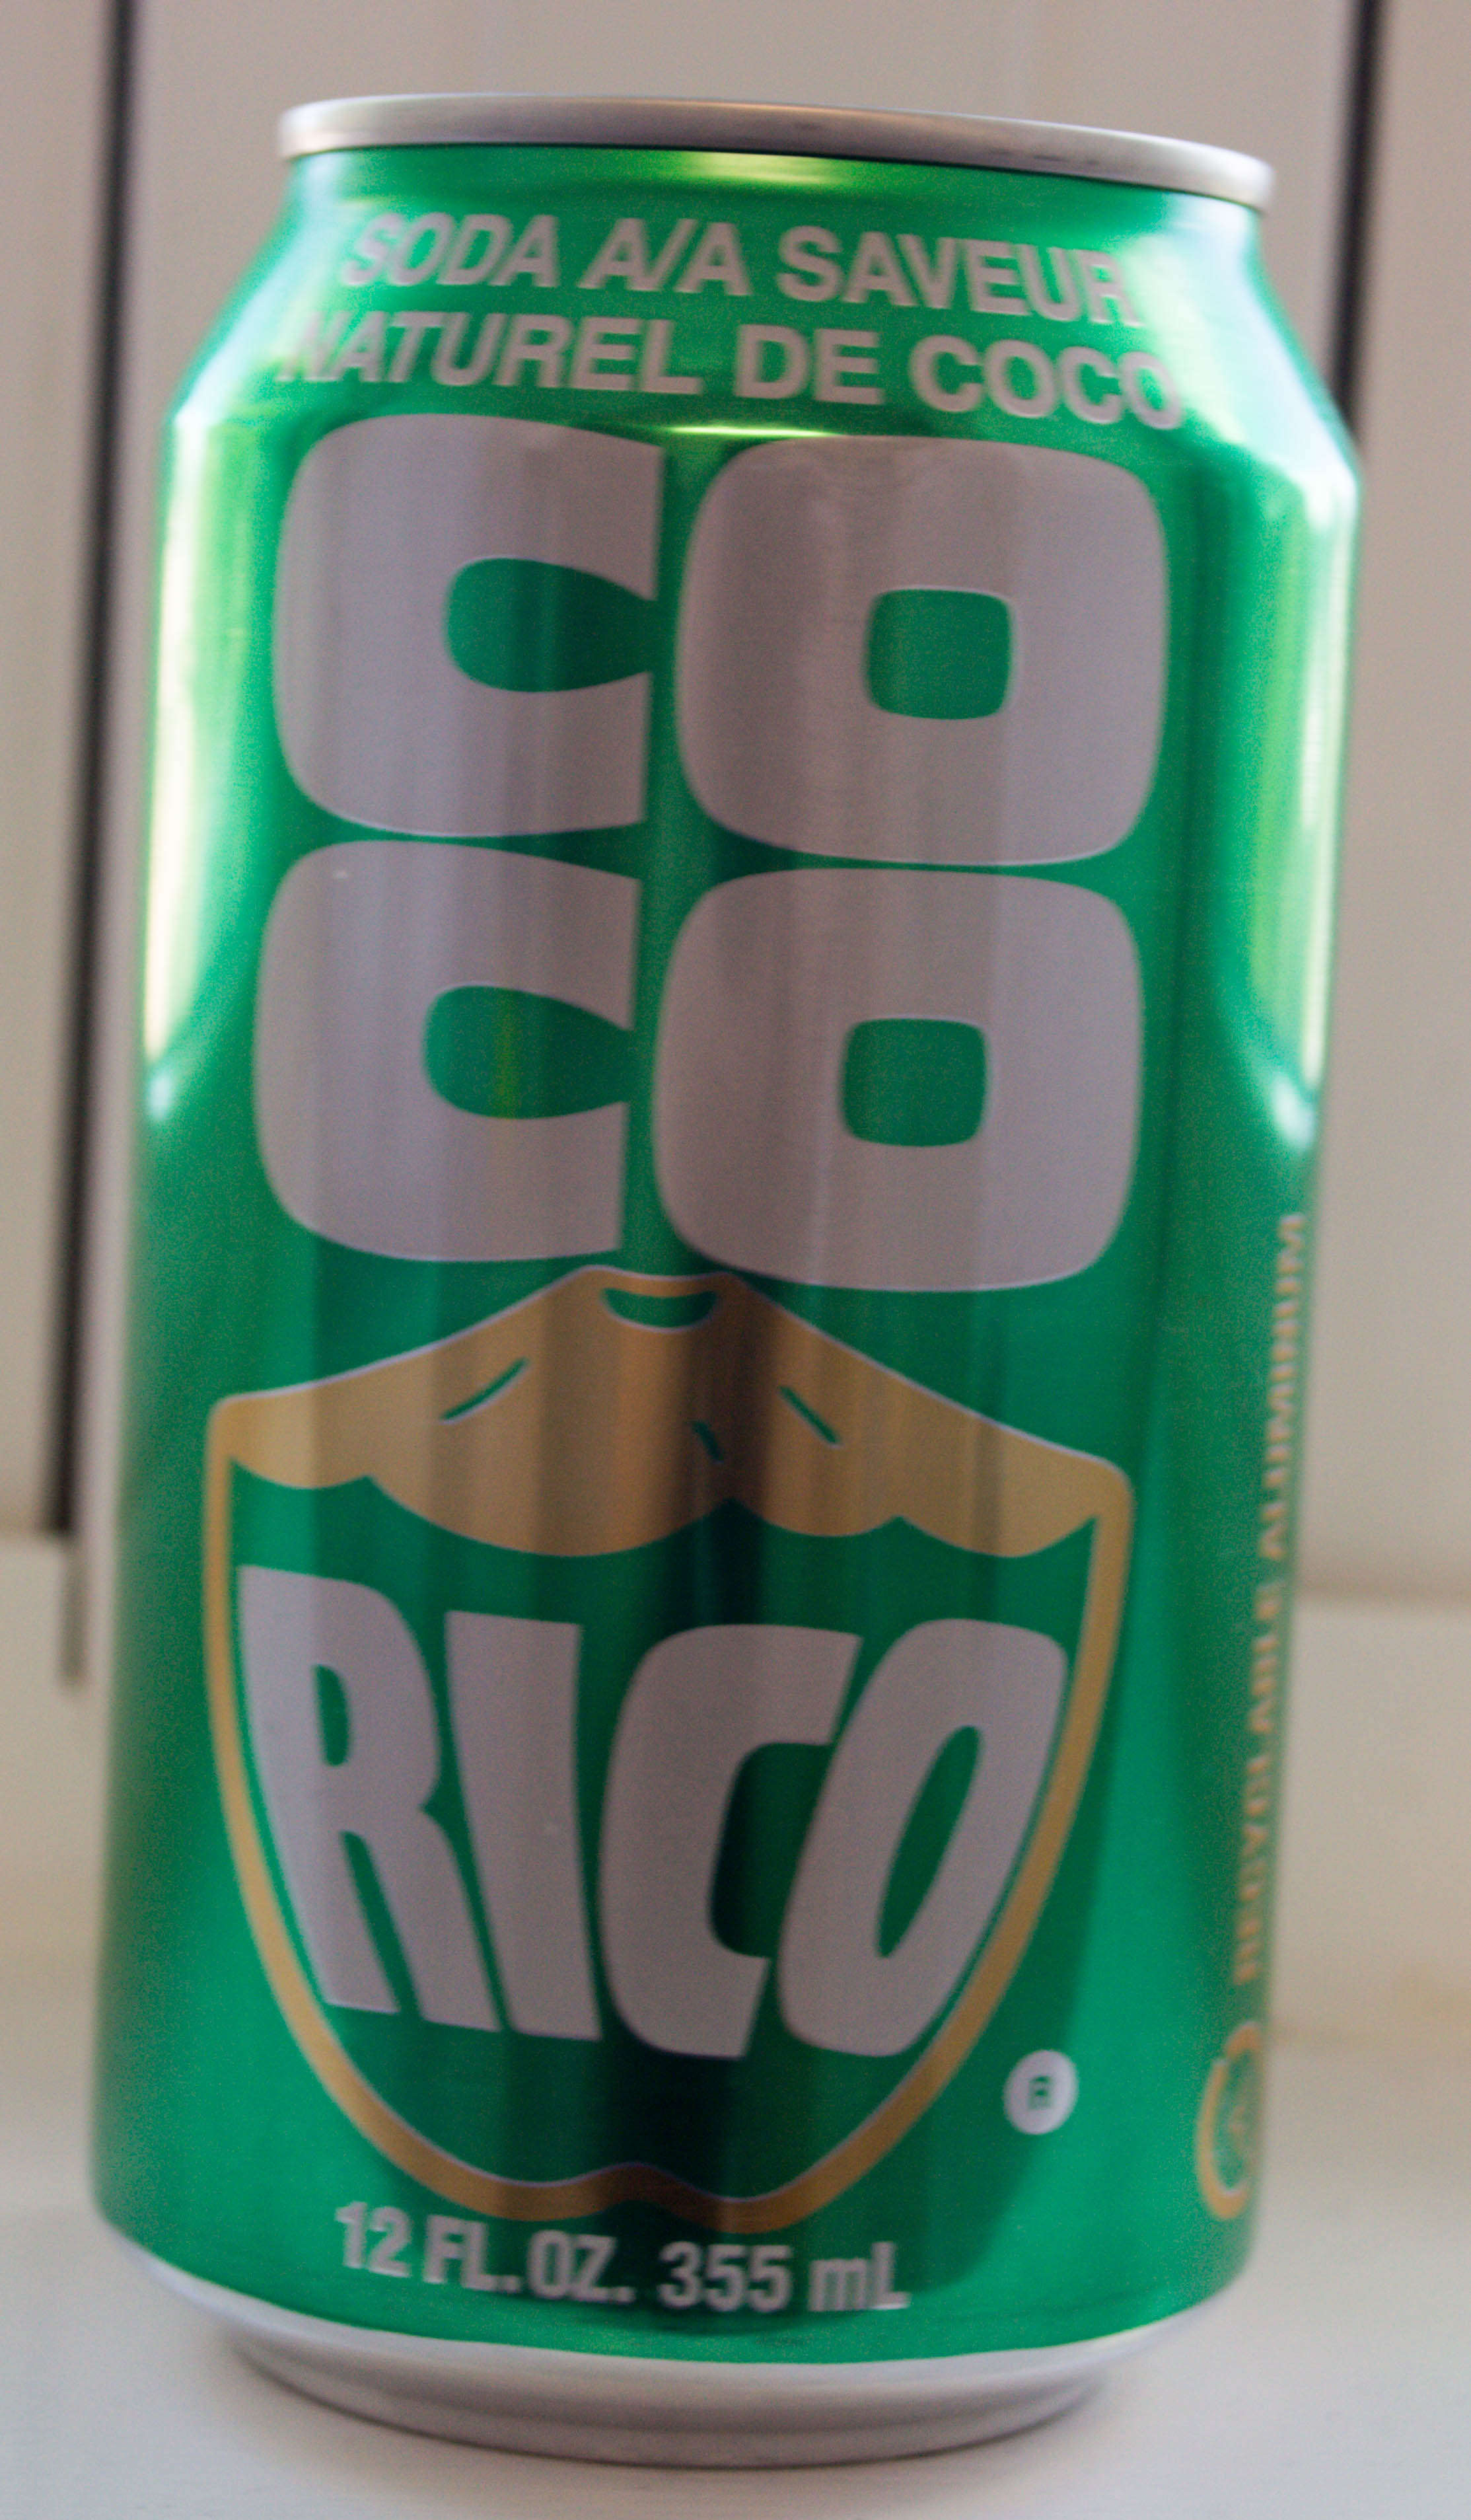
<p style='text-indent:.5in'><span>There’s
nothing about this dish that I do not like, from the color to the flavors, nothing
I’d want to change. The brown caramel color is like candy for your eyes while
the fragrance of the sauce just lures you in. And the salty and sweet flavors
keep you wanting more! For those who would like to make this a bit healthier,
you can refrigerate the dish and skim off the fat that consolidates at the top
to make this dish healthier. But do remember that fat is flavor so do leave
some for your palate’s enjoyment!</span></p>
<p><img src="https://fobesfamily.com/assets/images/2015/12/20150924-20150924-DSC_4324.jpg" alt="" />
<img src="https://fobesfamily.com/assets/images/2015/12/20150924-20150924-DSC_4334.jpg" alt="" /></p>
<table class=MsoTableGrid border=1 cellspacing=0 cellpadding=0 width=542
style='width:541.9pt;border-collapse:collapse;border:none'>
<tr style='height:20.9pt'>
<td width=203 style='width:203.4pt;border:solid windowtext 1.0pt;padding:
0in 5.4pt 0in 5.4pt;height:20.9pt'>
<p><span>8 eggs, soft boiled</span></p>
</td>
<td width=339 style='width:338.5pt;border:solid windowtext 1.0pt;border-left:
none;padding:0in 5.4pt 0in 5.4pt;height:20.9pt'>
<p><span>1. Peel and poke tiny
holes around the egg with a toothpick.</span></p>
<p> </p>
<p><span>(NOTE: This is to allow
the egg to easily absorb the flavor and color of the dish.)</span></p>
</td>
</tr>
<tr style='height:20.9pt'>
<td width=203 style='width:203.4pt;border:solid windowtext 1.0pt;border-top:
none;padding:0in 5.4pt 0in 5.4pt;height:20.9pt'>
<p><span>1/3 cup sugar</span></p>
</td>
<td width=339 style='width:338.5pt;border-top:none;border-left:none;
border-bottom:solid windowtext 1.0pt;border-right:solid windowtext 1.0pt;
padding:0in 5.4pt 0in 5.4pt;height:20.9pt'>
<p><span>2. In a deep pot on high
heat, melt the sugar, stirring constantly until it becomes a deep brown color
and becomes bubbly.</span></p>
<p><span>3. Turn off heat.</span></p>
</td>
</tr>
<tr style='height:98.05pt'>
<td width=203 style='width:203.4pt;border:solid windowtext 1.0pt;border-top:
none;padding:0in 5.4pt 0in 5.4pt;height:98.05pt'>
<p><span>1 cup water, boiling</span></p>
</td>
<td width=339 style='width:338.5pt;border-top:none;border-left:none;
border-bottom:solid windowtext 1.0pt;border-right:solid windowtext 1.0pt;
padding:0in 5.4pt 0in 5.4pt;height:98.05pt'>
<p><span>4. Slowly add water to the
sugar to create a brown caramel color liquid.</span></p>
<p><span> </span></p>
<p><span>(NOTE: Be careful of the
splatter as it’s HOT HOT HOT!)</span></p>
<p><span> </span></p>
<p><span>5. Turn the heat back on
to high and re-melt any re-crystalized sugar as necessary and set aside.</span></p>
</td>
</tr>
<tr style='height:20.9pt'>
<td width=203 style='width:203.4pt;border:solid windowtext 1.0pt;border-top:
none;padding:0in 5.4pt 0in 5.4pt;height:20.9pt'>
<p><span>1 tbsp of oil</span></p>
</td>
<td width=339 style='width:338.5pt;border-top:none;border-left:none;
border-bottom:solid windowtext 1.0pt;border-right:solid windowtext 1.0pt;
padding:0in 5.4pt 0in 5.4pt;height:20.9pt'>
<p><span>6. In a large dutch oven,
on medium-high heat, add the oil.</span></p>
</td>
</tr>
<tr style='height:20.9pt'>
<td width=203 style='width:203.4pt;border:solid windowtext 1.0pt;border-top:
none;padding:0in 5.4pt 0in 5.4pt;height:20.9pt'>
<p><span>1 1/2 lbs pork belly, cut
into 1” cubes</span></p>
</td>
<td width=339 style='width:338.5pt;border-top:none;border-left:none;
border-bottom:solid windowtext 1.0pt;border-right:solid windowtext 1.0pt;
padding:0in 5.4pt 0in 5.4pt;height:20.9pt'>
<p><span>7. Brown the pork in
batches if needed.</span></p>
</td>
</tr>
<tr style='height:20.9pt'>
<td width=203 style='width:203.4pt;border:solid windowtext 1.0pt;border-top:
none;padding:0in 5.4pt 0in 5.4pt;height:20.9pt'>
<p><span>1/2 tsp salt</span></p>
</td>
<td width=339 rowspan=4 style='width:338.5pt;border-top:none;border-left:
none;border-bottom:solid windowtext 1.0pt;border-right:solid windowtext 1.0pt;
padding:0in 5.4pt 0in 5.4pt;height:20.9pt'>
<p><span>8. Add the seasoning and
mix well.</span></p>
<p><span>9. Gently place the eggs
in the pot and pour in the sugar color.</span></p>
</td>
</tr>
<tr style='height:20.9pt'>
<td width=203 style='width:203.4pt;border:solid windowtext 1.0pt;border-top:
none;padding:0in 5.4pt 0in 5.4pt;height:20.9pt'>
<p><span>1/3 cup oyster sauce</span></p>
</td>
</tr>
<tr style='height:20.9pt'>
<td width=203 style='width:203.4pt;border:solid windowtext 1.0pt;border-top:
none;padding:0in 5.4pt 0in 5.4pt;height:20.9pt'>
<p><span>1/4 cup fish sauce</span></p>
</td>
</tr>
<tr style='height:20.9pt'>
<td width=203 style='width:203.4pt;border:solid windowtext 1.0pt;border-top:
none;padding:0in 5.4pt 0in 5.4pt;height:20.9pt'>
<p><span>1/2 tsp msg (optional)</span></p>
</td>
</tr>
<tr style='height:20.9pt'>
<td width=203 style='width:203.4pt;border:solid windowtext 1.0pt;border-top:
none;padding:0in 5.4pt 0in 5.4pt;height:20.9pt'>
<p><span>12 fl oz can of coconut
soda</span></p>
</td>
<td width=339 style='width:338.5pt;border-top:none;border-left:none;
border-bottom:solid windowtext 1.0pt;border-right:solid windowtext 1.0pt;
padding:0in 5.4pt 0in 5.4pt;height:20.9pt'>
<p><span>10. Pour in the coconut
soda and bring to a boil, skimming as needed.</span></p>
<p><span>11. Lower to medium-low
heat and simmer with the lid slightly ajar for about 60 minutes until the
pork is tender and easily poked through with a fork.</span></p>
<p><span> </span></p>
<p><span>(NOTE: At the last 20
minutes, check to make sure you have plenty of sauce to cook the meat. If not
then add about 1 cup of water to prevent burning.)</span></p>
<p><span> </span></p>
<p><span>12. Be sure to stir the
contents every 20 minutes to get an even color.</span></p>
<p><span>13. Once the pork is
tender enough, uncover the lid, increase the heat and reduce the sauce to
your desired consistency.</span></p>
<p><span>14. Serve hot.</span></p>
</td>
</tr>
</table>
Garlicky Bang Bang Shrimp Pasta2015-11-15T00:00:00+00:00http://fobesfamily.com/2015/11/15/garlicky-bang-bang-shrimp-pasta<p><img src="https://fobesfamily.com/assets/images/2015/11/20151114-DSC_4872.jpg" alt="" /></p>
<p align=center style='text-align:center'><span>(Serves 6)</span></p>
<p style='text-indent:.5in'><span>I
can’t believe that I have been working on this food blog for almost 5 months
now and still have yet to post a pasta recipe! Well, that will change today. As
requested I have for you the recipe for my Garlicky Bang Bang Shrimp Pasta. I
have made this dish quite a few times now as I was never completely satisfied with
the consistency and color of the sauce. I felt that the sauce was too creamy
causing the color and texture to suffer as a result. However, today’s version
was exactly what I wanted. The color is more of a vibrant red and the coated
pasta while still creamy has a smooth texture.</span></p>
<p><img src="https://fobesfamily.com/assets/images/2015/11/20151114-DSC_4841.jpg" alt="" /></p>
<p style='text-indent:.5in'><span>The
spicy shrimp causes me to reminisce about the time period when I was still
living in New Orleans with my husband. It was really the first time in our
relationship where we could freely go out and experience everything together.
It was also a time where we went out and frequented many mom and pop
restaurants to experience the local cuisine. I suppose, according to many, New
Orleans is a great place for these kind of adventures and we do not disagree.
We surely ate well the years that we were there. </span></p>
<p><img src="https://fobesfamily.com/assets/images/2015/11/20151114-DSC_4848.jpg" alt="" />
<img src="https://fobesfamily.com/assets/images/2015/11/20151114-DSC_4869.jpg" alt="" /></p>
<p style='text-indent:.5in'><span>Of
course I needed a vegetable to go with this dish and okra seemed to be the
answer. I served <u>Crispy Oven-Baked Okra</u> to get another food group on the
table. (Recipe coming soon.) I hope you will enjoy the Garlicky Bang Bang
Shrimp Pasta as much as my family. My poor little Evie was puffing a little
from the spice but still asked for more... I guess a little heat never hurt
anyone yeah? </span></p>
<p><img src="https://fobesfamily.com/assets/images/2015/11/20151114-DSC_4839.jpg" alt="" /></p>
<table class=MsoTableGrid border=1 cellspacing=0 cellpadding=0 width=533
style='width:533.05pt;border-collapse:collapse;border:none'>
<tr style='height:21.15pt'>
<td width=190 style='width:189.9pt;border:solid windowtext 1.0pt;padding:
0in 5.4pt 0in 5.4pt;height:21.15pt'>
<p><span>3/4 cup mayonnaise</span></p>
</td>
<td width=343 rowspan=5 style='width:343.15pt;border:solid windowtext 1.0pt;
border-left:none;padding:0in 5.4pt 0in 5.4pt;height:21.15pt'>
<p><span>1. In a bowl, whisk the
sauce ingredient together until well blended and set aside.</span></p>
</td>
</tr>
<tr style='height:20.85pt'>
<td width=190 style='width:189.9pt;border:solid windowtext 1.0pt;border-top:
none;padding:0in 5.4pt 0in 5.4pt;height:20.85pt'>
<p><span>2 tbsps garlic chili</span></p>
</td>
</tr>
<tr style='height:20.85pt'>
<td width=190 style='width:189.9pt;border:solid windowtext 1.0pt;border-top:
none;padding:0in 5.4pt 0in 5.4pt;height:20.85pt'>
<p><span>3 tbsps lime juice, fresh</span></p>
</td>
</tr>
<tr style='height:20.85pt'>
<td width=190 style='width:189.9pt;border:solid windowtext 1.0pt;border-top:
none;padding:0in 5.4pt 0in 5.4pt;height:20.85pt'>
<p><span>1 tsp Sriracha</span></p>
</td>
</tr>
<tr style='height:20.85pt'>
<td width=190 style='width:189.9pt;border:solid windowtext 1.0pt;border-top:
none;padding:0in 5.4pt 0in 5.4pt;height:20.85pt'>
<p><span>1 tsp red pepper flakes</span></p>
</td>
</tr>
<tr style='height:20.85pt'>
<td width=190 style='width:189.9pt;border:solid windowtext 1.0pt;border-top:
none;padding:0in 5.4pt 0in 5.4pt;height:20.85pt'>
<p><span>1 lb shrimp, peeled and
deveined</span></p>
</td>
<td width=343 rowspan=6 style='width:343.15pt;border-top:none;border-left:
none;border-bottom:solid windowtext 1.0pt;border-right:solid windowtext 1.0pt;
padding:0in 5.4pt 0in 5.4pt;height:20.85pt'>
<p><span>2. In a baking pan, toss
the shrimp and seasoning together and let marinate for at least 15 minutes
prior to cooking.</span></p>
<p><span> </span></p>
<p><span>(NOTE: I toned down the
heat a bit so feel free to up the spice if needed.)</span></p>
<p><span> </span></p>
<p><span>3. Ensure that the shrimp
is in a single layer on the baking pan.</span></p>
<p><span>4. Bake at 400F for about
10 minutes until the shrimp is pink and cooked through.</span></p>
<p><span>5. Remove from the oven.</span></p>
</td>
</tr>
<tr style='height:20.85pt'>
<td width=190 style='width:189.9pt;border:solid windowtext 1.0pt;border-top:
none;padding:0in 5.4pt 0in 5.4pt;height:20.85pt'>
<p><span>3 tbsps garlic, minced</span></p>
</td>
</tr>
<tr style='height:20.85pt'>
<td width=190 style='width:189.9pt;border:solid windowtext 1.0pt;border-top:
none;padding:0in 5.4pt 0in 5.4pt;height:20.85pt'>
<p><span>1 1/4 tsp paprika</span></p>
</td>
</tr>
<tr style='height:20.85pt'>
<td width=190 style='width:189.9pt;border:solid windowtext 1.0pt;border-top:
none;padding:0in 5.4pt 0in 5.4pt;height:20.85pt'>
<p><span>1 tsp salt</span></p>
</td>
</tr>
<tr style='height:20.85pt'>
<td width=190 style='width:189.9pt;border:solid windowtext 1.0pt;border-top:
none;padding:0in 5.4pt 0in 5.4pt;height:20.85pt'>
<p><span>1/4 tsp black pepper</span></p>
</td>
</tr>
<tr style='height:20.85pt'>
<td width=190 style='width:189.9pt;border:solid windowtext 1.0pt;border-top:
none;padding:0in 5.4pt 0in 5.4pt;height:20.85pt'>
<p><span>1 tbsp olive oil</span></p>
</td>
</tr>
<tr style='height:20.85pt'>
<td width=190 style='width:189.9pt;border:solid windowtext 1.0pt;border-top:
none;padding:0in 5.4pt 0in 5.4pt;height:20.85pt'>
<p><span>1 lb spaghetti, cooked</span></p>
</td>
<td width=343 style='width:343.15pt;border-top:none;border-left:none;
border-bottom:solid windowtext 1.0pt;border-right:solid windowtext 1.0pt;
padding:0in 5.4pt 0in 5.4pt;height:20.85pt'>
<p><span>6. In a large mixing bowl,
toss the pasta, shrimp and sauce until well incorporated.</span></p>
</td>
</tr>
<tr style='height:20.85pt'>
<td width=190 style='width:189.9pt;border:solid windowtext 1.0pt;border-top:
none;padding:0in 5.4pt 0in 5.4pt;height:20.85pt'>
<p><span>Parsley, chopped</span></p>
</td>
<td width=343 style='width:343.15pt;border-top:none;border-left:none;
border-bottom:solid windowtext 1.0pt;border-right:solid windowtext 1.0pt;
padding:0in 5.4pt 0in 5.4pt;height:20.85pt'>
<p><span>7. Plate and garnish with
parsley prior to serving.</span></p>
</td>
</tr>
</table>
Vietnamese Savory Crepes (bánh Xèo)2015-10-31T00:00:00+00:00http://fobesfamily.com/2015/10/31/vietnamese-savory-crepes-(bánh-xèo)<p><img src="https://fobesfamily.com/assets/images/2015/10/20150802-20150802-DSC_4087.jpg" alt="" /></p>
<p align=center style='text-align:center'><span>(Serves 6)</span></p>
<p style='text-indent:.5in'><span style=''>The
Vietnamese Savory Crepe (Bánh Xèo) is a very popular item on the Vietnamese menu. It was definitely popular in my house when I was a child and still is now with my husband and daughter. He has been hooked on this dish since I first introduced him to it years and years ago while we were dating. I guess the old adage, “A way to a man’s heart is through his stomach” is not that far-fetched. Seriously though, this dish gives you the best of everything. A crispy, crunchy, fragrant crepe on the outside, stuffed with shrimp and bean sprouts and paired with a pungent dipping sauce and herbs and vegetables galore. What more do you want? I can recall a time where I could down a basket of herbs and veggies with just one or two crepes!</span></p>
<p><img src="https://fobesfamily.com/assets/images/2015/10/20150801-20150801-DSC_4062.jpg" alt="" />
<img src="https://fobesfamily.com/assets/images/2015/10/20150801-20150801-DSC_4063.jpg" alt="" /></p>
<p style='text-indent:.5in'><span style=''>I’m going to be candid here, there is a bit of work you need to put into prepping for this meal. Aside from what is stated in the recipe, there is also the dipping sauce you need to make and lots of vegetables and herbs to wash and sort but it is so worth the trouble. Below I have a list of vegetables and herbs that are usually eaten with Bánh Xèo that you can refer to if needed. You can eat these amazing crepes on it’s own but when paired with the herbs and vegetables, the flavor profile just soars exponentially. Also, don’t skip out on the dipping sauce as it brings everything together.</span></p>
<p><img src="https://fobesfamily.com/assets/images/2015/10/20150801-20150801-DSC_4066.jpg" alt="" />
<img src="https://fobesfamily.com/assets/images/2015/10/20150801-20150801-DSC_4069.jpg" alt="" /></p>
<p style='text-indent:.5in'><span style=''>There is a learning curve when it comes to perfectly cooking these crepes. When I made my first Bánh Xèo, I had a lot of trouble keeping it intact and not soggy. Practice does makes perfect, I promise. Adding the beer instead of water really help with fixing the batter to make a crispy crepe which helped keep the crepe intact for that beautiful presentation effect. I have added some tips along with the instructions that should help you make the perfect crepe. Please enjoy and let me know how it goes!</span></p>
<p><img src="https://fobesfamily.com/assets/images/2015/10/20150802-20150802-DSC_4075.jpg" alt="" />
<img src="https://fobesfamily.com/assets/images/2015/10/20150802-20150802-DSC_4081.jpg" alt="" /></p>
<table border=1 cellspacing=0 cellpadding=0 width=533
style='width:533.4pt;border-collapse:collapse;border:none'>
<tr style='height:23.25pt'>
<td width=221 style='width:221.4pt;border:solid windowtext 1.0pt;padding:
0in 5.4pt 0in 5.4pt;height:23.25pt'>
<p><span style=''>12 oz Bánh Xèo Flour Mix
(1 package)</span></p>
</td>
<td width=312 rowspan=7 style='width:312.0pt;border:solid windowtext 1.0pt;
border-left:none;padding:0in 5.4pt 0in 5.4pt;height:23.25pt'>
<p><span style=''>1. Mix until everything is
well incorporated.</span></p>
</td>
</tr>
<tr style='height:21.9pt'>
<td width=221 style='width:221.4pt;border:solid windowtext 1.0pt;border-top:
none;padding:0in 5.4pt 0in 5.4pt;height:21.9pt'>
<p><span style=''>1 tsp turmeric</span></p>
</td>
</tr>
<tr style='height:21.9pt'>
<td width=221 style='width:221.4pt;border:solid windowtext 1.0pt;border-top:
none;padding:0in 5.4pt 0in 5.4pt;height:21.9pt'>
<p><span style=''>2 bottle of beer
(11.2 oz each, I used Stella Artois) </span></p>
</td>
</tr>
<tr style='height:21.9pt'>
<td width=221 style='width:221.4pt;border:solid windowtext 1.0pt;border-top:
none;padding:0in 5.4pt 0in 5.4pt;height:21.9pt'>
<p><span style=''>1 cup coconut milk</span></p>
</td>
</tr>
<tr style='height:21.9pt'>
<td width=221 style='width:221.4pt;border:solid windowtext 1.0pt;border-top:
none;padding:0in 5.4pt 0in 5.4pt;height:21.9pt'>
<p><span style=''>2/3 cup water</span></p>
</td>
</tr>
<tr style='height:21.9pt'>
<td width=221 style='width:221.4pt;border:solid windowtext 1.0pt;border-top:
none;padding:0in 5.4pt 0in 5.4pt;height:21.9pt'>
<p><span style=''>2 drops red food coloring
(optional)</span></p>
</td>
</tr>
<tr style='height:21.9pt'>
<td width=221 style='width:221.4pt;border:solid windowtext 1.0pt;border-top:
none;padding:0in 5.4pt 0in 5.4pt;height:21.9pt'>
<p><span style=''>4 drops yellow food
coloring (optional)</span></p>
</td>
</tr>
<tr style='height:21.9pt'>
<td width=221 style='width:221.4pt;border:solid windowtext 1.0pt;border-top:
none;padding:0in 5.4pt 0in 5.4pt;height:21.9pt'>
<p><span style=''>1 1/4 cup scallions, green
only, chopped small</span></p>
</td>
<td width=312 style='width:312.0pt;border-top:none;border-left:none;
border-bottom:solid windowtext 1.0pt;border-right:solid windowtext 1.0pt;
padding:0in 5.4pt 0in 5.4pt;height:21.9pt'>
<p><span style=''>2. Stir in the scallions
and refrigerate the batter for at least one hour or overnight for best
result.</span></p>
<p><span style=''>(NOTE: The batter keeps
for about 3 days.)</span></p>
</td>
</tr>
<tr style='height:21.9pt'>
<td width=221 style='width:221.4pt;border:solid windowtext 1.0pt;border-top:
none;padding:0in 5.4pt 0in 5.4pt;height:21.9pt'>
<p><span style=''>1 lb of shrimp, shelled
and deveined</span></p>
</td>
<td width=312 style='width:312.0pt;border-top:none;border-left:none;
border-bottom:solid windowtext 1.0pt;border-right:solid windowtext 1.0pt;
padding:0in 5.4pt 0in 5.4pt;height:21.9pt'>
<p><span style=''>3. Washed, dried and cut
it half lengthwise if large.</span></p>
</td>
</tr>
<tr style='height:21.9pt'>
<td width=221 style='width:221.4pt;border:solid windowtext 1.0pt;border-top:
none;padding:0in 5.4pt 0in 5.4pt;height:21.9pt'>
<p><span style=''>1 tbsp olive oil</span></p>
</td>
<td width=312 rowspan=6 style='width:312.0pt;border-top:none;border-left:
none;border-bottom:solid windowtext 1.0pt;border-right:solid windowtext 1.0pt;
padding:0in 5.4pt 0in 5.4pt;height:21.9pt'>
<p><span style=''>4. On medium high heat,
sauté scallions and onions together with seasoning for about 2 minutes. </span></p>
</td>
</tr>
<tr style='height:21.9pt'>
<td width=221 style='width:221.4pt;border:solid windowtext 1.0pt;border-top:
none;padding:0in 5.4pt 0in 5.4pt;height:21.9pt'>
<p><span style=''>1/3 cup scallions, white
only, chopped</span></p>
</td>
</tr>
<tr style='height:21.9pt'>
<td width=221 style='width:221.4pt;border:solid windowtext 1.0pt;border-top:
none;padding:0in 5.4pt 0in 5.4pt;height:21.9pt'>
<p><span style=''>1/2 cup yellow onion,
sliced thinly </span></p>
</td>
</tr>
<tr style='height:21.9pt'>
<td width=221 style='width:221.4pt;border:solid windowtext 1.0pt;border-top:
none;padding:0in 5.4pt 0in 5.4pt;height:21.9pt'>
<p><span style=''>1/4 tsp salt</span></p>
</td>
</tr>
<tr style='height:21.9pt'>
<td width=221 style='width:221.4pt;border:solid windowtext 1.0pt;border-top:
none;padding:0in 5.4pt 0in 5.4pt;height:21.9pt'>
<p><span style=''>1/2 tsp sugar</span></p>
</td>
</tr>
<tr style='height:21.9pt'>
<td width=221 style='width:221.4pt;border:solid windowtext 1.0pt;border-top:
none;padding:0in 5.4pt 0in 5.4pt;height:21.9pt'>
<p><span style=''>1/4 tsp msg (optional)</span></p>
</td>
</tr>
<tr style='height:21.9pt'>
<td width=221 style='width:221.4pt;border:solid windowtext 1.0pt;border-top:
none;padding:0in 5.4pt 0in 5.4pt;height:21.9pt'>
<p><span style=''>1 tbsp fish sauce</span></p>
</td>
<td width=312 style='width:312.0pt;border-top:none;border-left:none;
border-bottom:solid windowtext 1.0pt;border-right:solid windowtext 1.0pt;
padding:0in 5.4pt 0in 5.4pt;height:21.9pt'>
<p><span style=''>5. Increase to high heat,
toss in the shrimp and fish sauce and cook until the shrimp turns pink. About
5 minutes.</span></p>
<p><span style=''>6. Set this filling aside.</span></p>
</td>
</tr>
<tr style='height:21.9pt'>
<td width=221 style='width:221.4pt;border:solid windowtext 1.0pt;border-top:
none;padding:0in 5.4pt 0in 5.4pt;height:21.9pt'>
<p><span style=''>2 tbsps of vegetable oil</span></p>
</td>
<td width=312 rowspan=2 style='width:312.0pt;border-top:none;border-left:
none;border-bottom:solid windowtext 1.0pt;border-right:solid windowtext 1.0pt;
padding:0in 5.4pt 0in 5.4pt;height:21.9pt'>
<p><span style=''>7. Heat oil on medium high
heat in a large non-stick pan with a lid.</span></p>
<p><span style=''>8. Lift the pan off heat,
pour in about 2/3 cup of the batter and swirl it around to cover the pan.</span></p>
<p><span style=''>(NOTE: Make sure the oil
is hot so that there is a nice sizzle when you pour in the batter.)</span></p>
<p><span style=''>9. Lower to medium heat
and place the pan back on the stove.</span></p>
<p><span style=''>10. On half of the crepe add
1 cup of bean sprouts and 2 tbsps of the filling.</span></p>
<p><span style=''>11. Cover and let cook for
about 2 minutes.</span></p>
<p><span style=''>12. Remove the lid
carefully to prevent water from dripping into the pan and wipe the lid dry.</span></p>
<p><span style=''>13. Cover and cook for
another few minutes until it’s golden on one side and begins to pull away
from the pan.</span></p>
<p><span style=''>14. Fold the crepe in half
over the stuffing and serve immediately with dipping sauce and herbs and
vegetables.</span></p>
<p><span style=''>15. Repeat steps 7-14
until you run out of ingredients.</span></p>
</td>
</tr>
<tr style='height:21.9pt'>
<td width=221 style='width:221.4pt;border:solid windowtext 1.0pt;border-top:
none;padding:0in 5.4pt 0in 5.4pt;height:21.9pt'>
<p><span style=''>10 cups bean sprouts </span></p>
</td>
</tr>
</table>
<table border=1 cellspacing=0 cellpadding=0
style='border-collapse:collapse;border:none'>
<tr style='height:26.2pt'>
<td width=533 colspan=2 style='width:532.9pt;border:solid windowtext 1.0pt;
padding:0in 5.4pt 0in 5.4pt;height:26.2pt'>
<p align=center style='text-align:center'><span
style=''>Typical Vegetables and Herbs to Serve with Bánh Xèo</span></p>
</td>
</tr>
<tr style='height:26.15pt'>
<td width=266 style='width:266.45pt;border:solid windowtext 1.0pt;border-top:
none;padding:0in 5.4pt 0in 5.4pt;height:26.15pt'>
<p><span style=''>Cucumbers</span></p>
</td>
<td width=266 style='width:266.45pt;border-top:none;border-left:none;
border-bottom:solid windowtext 1.0pt;border-right:solid windowtext 1.0pt;
padding:0in 5.4pt 0in 5.4pt;height:26.15pt'>
<p><span style=''>Cilantro</span></p>
</td>
</tr>
<tr style='height:26.15pt'>
<td width=266 style='width:266.45pt;border:solid windowtext 1.0pt;border-top:
none;padding:0in 5.4pt 0in 5.4pt;height:26.15pt'>
<p><span style=''>Lettuce</span></p>
</td>
<td width=266 style='width:266.45pt;border-top:none;border-left:none;
border-bottom:solid windowtext 1.0pt;border-right:solid windowtext 1.0pt;
padding:0in 5.4pt 0in 5.4pt;height:26.15pt'>
<p><span style=''>Perilla Leaves</span></p>
</td>
</tr>
<tr style='height:26.15pt'>
<td width=266 style='width:266.45pt;border:solid windowtext 1.0pt;border-top:
none;padding:0in 5.4pt 0in 5.4pt;height:26.15pt'>
<p><span style=''>Mint</span></p>
</td>
<td width=266 style='width:266.45pt;border-top:none;border-left:none;
border-bottom:solid windowtext 1.0pt;border-right:solid windowtext 1.0pt;
padding:0in 5.4pt 0in 5.4pt;height:26.15pt'>
<p><span style=''>Vietnamese coriander</span></p>
</td>
</tr>
<tr style='height:26.15pt'>
<td width=266 style='width:266.45pt;border:solid windowtext 1.0pt;border-top:
none;padding:0in 5.4pt 0in 5.4pt;height:26.15pt'>
<p><span style=''>Thai Basil</span></p>
</td>
<td width=266 style='width:266.45pt;border-top:none;border-left:none;
border-bottom:solid windowtext 1.0pt;border-right:solid windowtext 1.0pt;
padding:0in 5.4pt 0in 5.4pt;height:26.15pt'>
<p><span style=''>Vietnamese balm</span></p>
</td>
</tr>
</table>
<p><img src="https://fobesfamily.com/assets/images/2015/10/20150802-20150802-DSC_4077.jpg" alt="" /></p>
<table border=1 cellspacing=0 cellpadding=0
style='border-collapse:collapse;border:none'>
<tr style='height:23.9pt'>
<td width=533 colspan=2 style='width:533.3pt;border:solid windowtext 1.0pt;
padding:0in 5.4pt 0in 5.4pt;height:23.9pt'>
<p align=center style='text-align:center'><span
style=''>Lime Fish Sauce Dressing (makes 3 cups)</span></p>
</td>
</tr>
<tr style='height:23.9pt'>
<td width=186 style='width:186.15pt;border:solid windowtext 1.0pt;border-top:
none;padding:0in 5.4pt 0in 5.4pt;height:23.9pt'>
<p><span style=''>1 cup simple syrup</span></p>
</td>
<td width=347 rowspan=7 style='width:347.15pt;border-top:none;border-left:
none;border-bottom:solid windowtext 1.0pt;border-right:solid windowtext 1.0pt;
padding:0in 5.4pt 0in 5.4pt;height:23.9pt'>
<p><span style=''>1. Mix together well.
(Keeps in the refrigerator for a couple of weeks.)</span></p>
</td>
</tr>
<tr style='height:23.9pt'>
<td width=186 style='width:186.15pt;border:solid windowtext 1.0pt;border-top:
none;padding:0in 5.4pt 0in 5.4pt;height:23.9pt'>
<p><span style=''>1/2 cup fish sauce</span></p>
</td>
</tr>
<tr style='height:23.9pt'>
<td width=186 style='width:186.15pt;border:solid windowtext 1.0pt;border-top:
none;padding:0in 5.4pt 0in 5.4pt;height:23.9pt'>
<p><span style=''>1/4 cup water</span></p>
</td>
</tr>
<tr style='height:22.5pt'>
<td width=186 style='width:186.15pt;border:solid windowtext 1.0pt;border-top:
none;padding:0in 5.4pt 0in 5.4pt;height:22.5pt'>
<p><span style=''>2 cup fresh lime juice</span></p>
</td>
</tr>
<tr style='height:23.9pt'>
<td width=186 style='width:186.15pt;border:solid windowtext 1.0pt;border-top:
none;padding:0in 5.4pt 0in 5.4pt;height:23.9pt'>
<p><span style=''>3 tbsps garlic, minced</span></p>
</td>
</tr>
<tr style='height:22.5pt'>
<td width=186 style='width:186.15pt;border:solid windowtext 1.0pt;border-top:
none;padding:0in 5.4pt 0in 5.4pt;height:22.5pt'>
<p><span style=''>2-4 thai chili, minced</span></p>
</td>
</tr>
<tr style='height:23.9pt'>
<td width=186 style='width:186.15pt;border:solid windowtext 1.0pt;border-top:
none;padding:0in 5.4pt 0in 5.4pt;height:23.9pt'>
<p><span style=''>1/2 jalapeño, minced </span></p>
</td>
</tr>
</table>
Shrimp Malabar Spinach Soup (canh Rau Mồng Tơi)2015-10-31T00:00:00+00:00http://fobesfamily.com/2015/10/31/shrimp-malabar-spinach-soup-(canh-rau-mồng-tơi)<p><img src="https://fobesfamily.com/assets/images/2015/10/20150914-20150914-DSC_4279.jpg" alt="" /></p>
<p align=center style='text-align:center'><span>(Serves 6)</span></p>
<p style='text-indent:.5in'><span style=''>So it seems that I have been going back to California a lot this year, like every 7-8 weeks! And of course, being a typical Vietnamese mother, my mommy would always send me back with a large care package filled with some kind of fruits, veggies and other edible delights! Hey, no complaints here. I get great treats that are hard to find where I live and also new ingredients to create more recipes for my blog; win-win. Well this last trip home I was able to convince most of my family to do a road trip back to New Mexico for a mini-vacation and to see what life is like outside of California. Let’s just say my parents are not huge fans of traveling…</span></p>
<p><img src="https://fobesfamily.com/assets/images/2015/10/20150914-20150914-DSC_4254.jpg" alt="" />
<img src="https://fobesfamily.com/assets/images/2015/10/20150914-20150914-DSC_4259.jpg" alt="" /></p>
<p style='text-indent:.5in'><span style=''>Recently, I had told my mom that I’ve been craving this Vietnamese soup that we used to eat all the time when I lived at home, Shrimp-Malabar Spinach Soup (Canh Rau Mồng Tơi) so she brought 4 pounds worth of the stuff with her on the road trip here (amongst other things)! What can I say, my mom has a soft spot when it comes to food with me. Once everyone left, the house felt extra empty and more quiet than usual with just Evie and I so I hit the kitchen to whip up some comfort soup with California goodies.</span></p>
<p><img src="https://fobesfamily.com/assets/images/2015/10/20150914-20150914-DSC_4263.jpg" alt="" />
<img src="https://fobesfamily.com/assets/images/2015/10/20150914-20150914-DSC_4266.jpg" alt="" /></p>
<p style='text-indent:.5in'><span style='; color:black'>Once I got the stock going the aroma wafted through the air like a comforting embrace. It’s been ages since I’ve cooked this dish! The smell just brought me back to my childhood, being in the kitchen with my mother as we made dinner for the family. I was constantly fighting the urge to “taste” the soup straight from the pot! The deep green color from the spinach just makes the pink cooked shrimp pop in the clear broth. The soft texture of the cooked leaves pairs well will the crunchy quality of freshly minced shrimp. A great side dish to accompany this soup is the <u>Pickled Vietnamese Eggplant (Cà Pháo)</u>. With each bite it releases an array of flavors: sweet, sour, spicy and has a wonderful crunch to boot! And on a major plus side, this meal is a high protein, low calorie meal! I hope you guys enjoy it as much as I do. Until next time!</span></p>
<p><img src="https://fobesfamily.com/assets/images/2015/10/20150914-20150914-DSC_4271-1.jpg" alt="" />
<img src="https://fobesfamily.com/assets/images/2015/10/20150914-20150914-DSC_4269.jpg" alt="" />
<img src="https://fobesfamily.com/assets/images/2015/10/20150914-20150914-DSC_4275.jpg" alt="" /></p>
<table border=1 cellspacing=0 cellpadding=0 width=533
style='width:533.2pt;border-collapse:collapse;border:none'>
<tr style='height:38.85pt'>
<td width=150 style='width:149.75pt;border:solid windowtext 1.0pt;padding:
0in 5.4pt 0in 5.4pt;height:38.85pt'>
<p><span style=''>14 oz shrimp</span></p>
</td>
<td width=383 style='width:383.45pt;border:solid windowtext 1.0pt;border-left:
none;padding:0in 5.4pt 0in 5.4pt;height:38.85pt'>
<p><span style=''>1. Peeled and deveined.</span></p>
<p><span style=''>2. Wash and pat dried.</span></p>
</td>
</tr>
<tr style='height:38.85pt'>
<td width=150 style='width:149.75pt;border:solid windowtext 1.0pt;border-top:
none;padding:0in 5.4pt 0in 5.4pt;height:38.85pt'>
<p><span style=''>1/4 tsp salt</span></p>
</td>
<td width=383 rowspan=4 style='width:383.45pt;border-top:none;border-left:
none;border-bottom:solid windowtext 1.0pt;border-right:solid windowtext 1.0pt;
padding:0in 5.4pt 0in 5.4pt;height:38.85pt'>
<p><span style=''>3. With a heavy cleaver,
coarsely chop the shrimp.</span></p>
<p><span style=''>4. Sprinkle seasoning on
the shrimp and proceed to finely mincing the shrimp until it becomes almost
paste-like and set aside.</span></p>
<p><span style=''>(NOTE: Do not mince the
shrimp in the food processor. The shrimp will have a rubbery quality once
cooked. Using a knife will yield a crunchy texture once the shrimp is
cooked.)</span></p>
</td>
</tr>
<tr style='height:38.85pt'>
<td width=150 style='width:149.75pt;border:solid windowtext 1.0pt;border-top:
none;padding:0in 5.4pt 0in 5.4pt;height:38.85pt'>
<p><span style=''>1/2 tsp sugar</span></p>
</td>
</tr>
<tr style='height:38.85pt'>
<td width=150 style='width:149.75pt;border:solid windowtext 1.0pt;border-top:
none;padding:0in 5.4pt 0in 5.4pt;height:38.85pt'>
<p><span style=''>1/4 tsp msg (optional)</span></p>
</td>
</tr>
<tr style='height:38.85pt'>
<td width=150 style='width:149.75pt;border:solid windowtext 1.0pt;border-top:
none;padding:0in 5.4pt 0in 5.4pt;height:38.85pt'>
<p><span style=''>1/2 tsp black pepper</span></p>
</td>
</tr>
<tr style='height:38.85pt'>
<td width=150 style='width:149.75pt;border:solid windowtext 1.0pt;border-top:
none;padding:0in 5.4pt 0in 5.4pt;height:38.85pt'>
<p><span style=''>2 lbs Malabar Spinach</span></p>
</td>
<td width=383 style='width:383.45pt;border-top:none;border-left:none;
border-bottom:solid windowtext 1.0pt;border-right:solid windowtext 1.0pt;
padding:0in 5.4pt 0in 5.4pt;height:38.85pt'>
<p><span style=''>5. Wash by gently
agitating it in several water baths to remove dirt and sand and prevent
bruising of the leaves.</span></p>
<p><span style=''>6. Let dry and slice into 1/3
inch strips.</span></p>
<p><span style=''>(NOTE: Do not re-rinse the
sliced leaves. The spinach is a very mucilaginous plant so the leaves will
release a thick, gluey substance that acts as a natural thickener for the
soup.) </span></p>
</td>
</tr>
<tr style='height:38.85pt'>
<td width=150 style='width:149.75pt;border:solid windowtext 1.0pt;border-top:
none;padding:0in 5.4pt 0in 5.4pt;height:38.85pt'>
<p><span style=''>10 cups water</span></p>
</td>
<td width=383 rowspan=5 style='width:383.45pt;border-top:none;border-left:
none;border-bottom:solid windowtext 1.0pt;border-right:solid windowtext 1.0pt;
padding:0in 5.4pt 0in 5.4pt;height:38.85pt'>
<p><span style=''>7. In a large 4-quart pot
add the water and seasoning and bring to a boil.</span></p>
<p><span style=''>8. While the broth is
coming to a boil, slowly add about 1/2 tbsp balls of the shrimp mix into the
pot until done.</span></p>
<p><span style=''>9. Skim the scum from the
broth as needed during this process to create a clear soup.</span></p>
<p><span style=''>10. Once the pot has come
to a boil, reduce to medium heat and simmer for about 5 minutes and skim the
broth until clear.</span></p>
<p><span style=''>11. Bring the pot back to
a boil and gradually add in the Malabar Spinach stirring it gently to
incorporate into the broth. (NOTE: Don’t worry if you think there is not
enough space. The spinach shrinks significantly once cooked.)</span></p>
<p><span style=''>12. Once all the spinach
is added, skim the soup as needed and bring it back to a boil for about 6
minutes to cook the spinach.</span></p>
<p><span style=''>13. Turn off heat and adjust
to taste.</span></p>
<p><span style=''>14. Serve immediately with
jasmine rice and other side dishes if desired.</span></p>
</td>
</tr>
<tr style='height:38.85pt'>
<td width=150 style='width:149.75pt;border:solid windowtext 1.0pt;border-top:
none;padding:0in 5.4pt 0in 5.4pt;height:38.85pt'>
<p><span style=''>1/4 cup fish sauce</span></p>
</td>
</tr>
<tr style='height:38.85pt'>
<td width=150 style='width:149.75pt;border:solid windowtext 1.0pt;border-top:
none;padding:0in 5.4pt 0in 5.4pt;height:38.85pt'>
<p><span style=''>1 tsp sugar</span></p>
</td>
</tr>
<tr style='height:38.85pt'>
<td width=150 style='width:149.75pt;border:solid windowtext 1.0pt;border-top:
none;padding:0in 5.4pt 0in 5.4pt;height:38.85pt'>
<p><span style=''>1/2 tsp salt</span></p>
</td>
</tr>
<tr style='height:38.85pt'>
<td width=150 style='width:149.75pt;border:solid windowtext 1.0pt;border-top:
none;padding:0in 5.4pt 0in 5.4pt;height:38.85pt'>
<p><span style=''>1/2 tsp msg (optional)</span></p>
</td>
</tr>
</table>